
R2-D2 Part 5: Skirt
Printing and assembling the R2-D2 skirt proved easier than expected once the correct print orientation was found. Filament alignment pins finally worked as intended, the skirt assembled perfectly, and the base ring fitted beautifully.
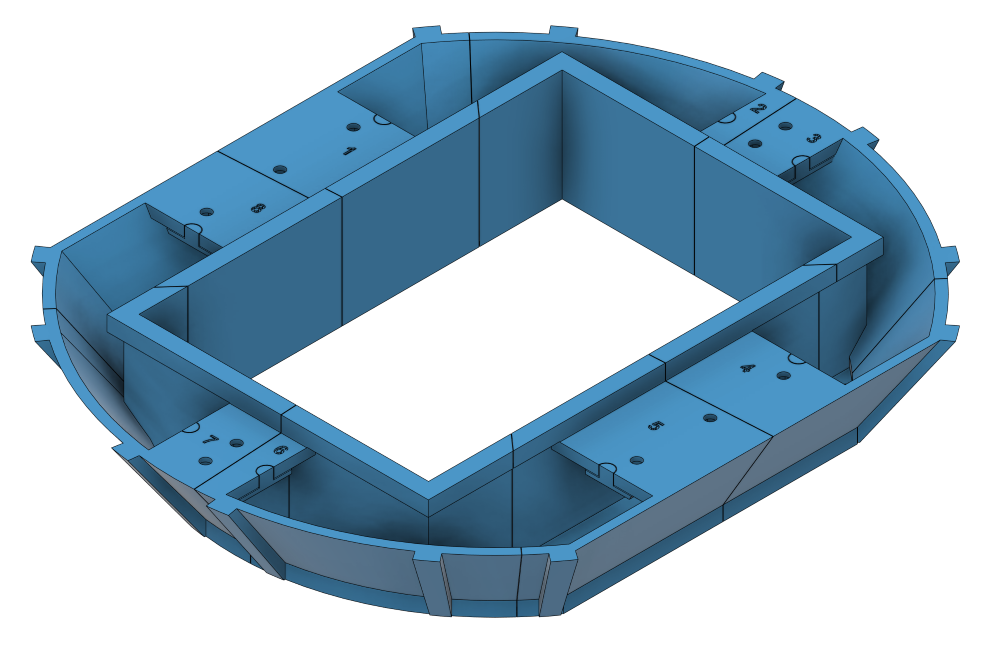
With the main body frame now complete, it was time to move on to the skirt. This section is made up of eight main parts, along with the skirt nut holders, and at first glance the parts looked a lot more complicated than some of the earlier ring sections. There were awkward shapes, large overhangs, and areas where I knew print orientation was going to matter.
Skirt 1 was a nice start and printed without any issues. After the challenges of the main body rings, it was good to have a straightforward print to ease into this next stage.
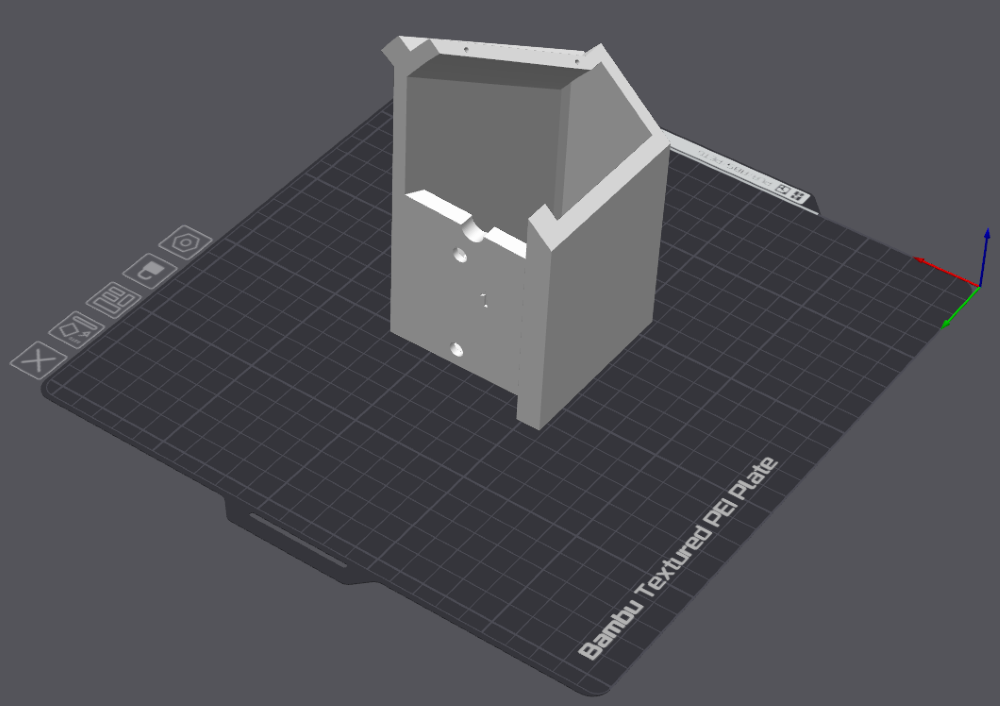
Skirt 2 was a different story. This part had me stopping and thinking before I even sent it to the printer. The main problem was deciding where the supports should go. There was a large 45-degree overhang, and although 45 degrees is often printable, this one was big enough to make me question whether the printer would cope cleanly without support.
When I first sliced it, the estimated print time came out at around nine hours, which felt like a lot for one skirt section, especially when I still wasn’t fully confident about the support placement. I even considered splitting the part into smaller pieces to remove the need for so much support, but that would have meant extra joins, extra gluing, and possibly more alignment issues later.
I spent a good twenty minutes turning the model around in the slicer, trying different orientations and looking for the best compromise. The part would only sit flat on the bed in two positions, but both still needed supports and still gave a long print time.
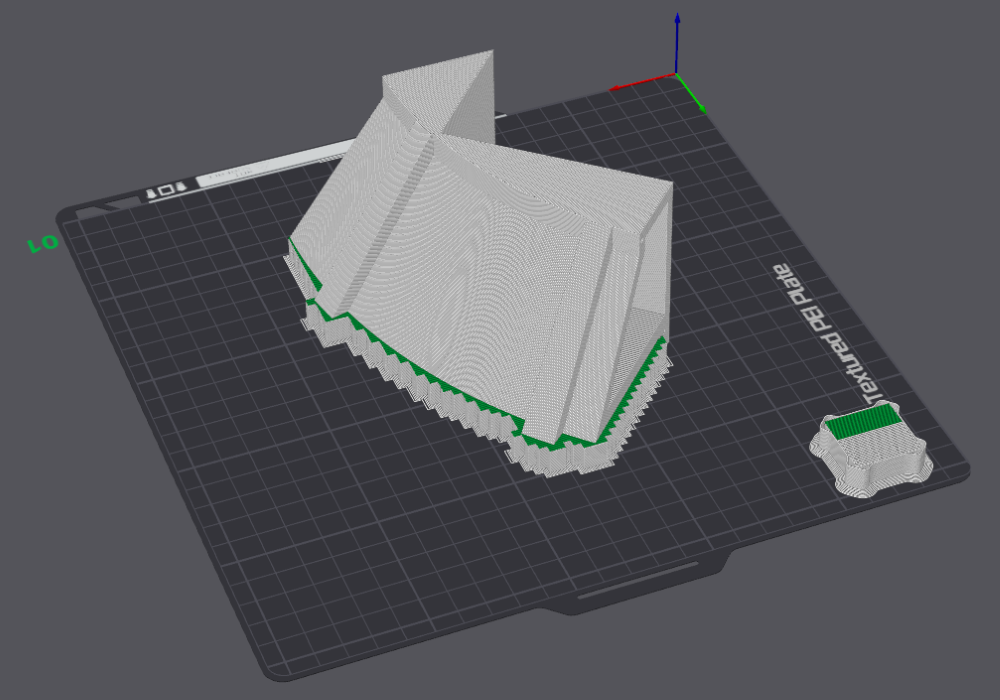
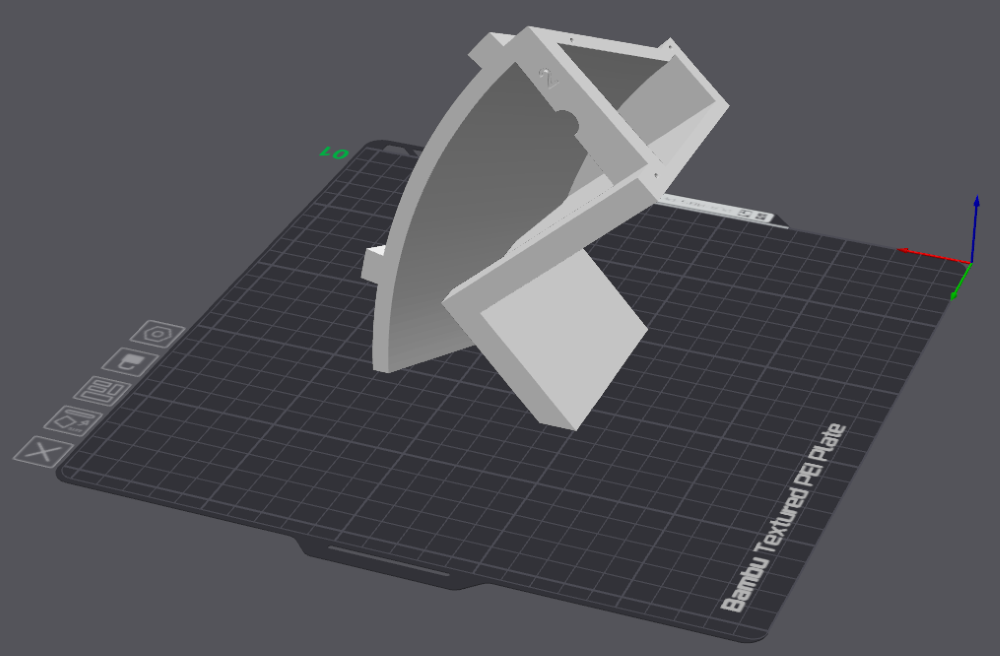
Then I found a much better orientation. By placing it a certain way round, the supports became much more sensible and the print time dropped from around nine hours to roughly three hours. That made the decision much easier, so I went ahead with that setup.
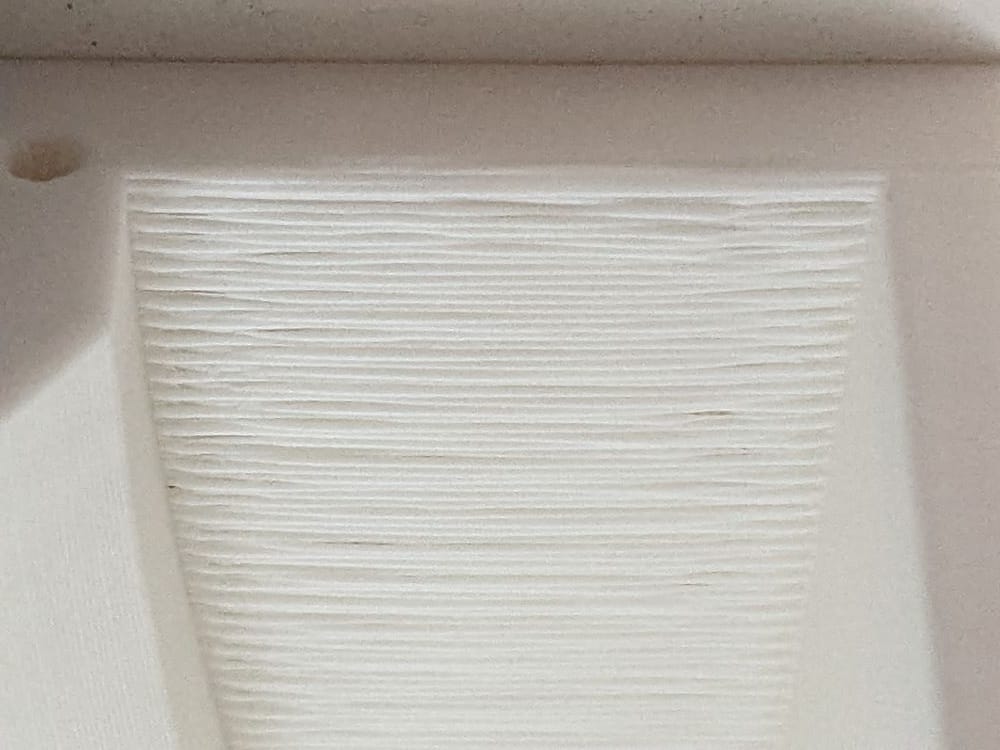
Another pleasant surprise was how well the bridging turned out. Some of the bridged sections were internal and would never be seen once the skirt was assembled, so cosmetic perfection wasn't particularly important. Even so, I was curious to see how the printer would handle them.
When the print finished, the bridged areas looked far better than I expected. There was very little sagging, and the lines were neat and consistent across the gaps. It's always reassuring when a printer exceeds expectations, especially on a part you've spent so much time worrying about before pressing the print button.
The result gave me even more confidence that I had found the right orientation and support strategy for these skirt sections. If the hidden areas looked this good, then the visible surfaces stood every chance of coming out just as well.
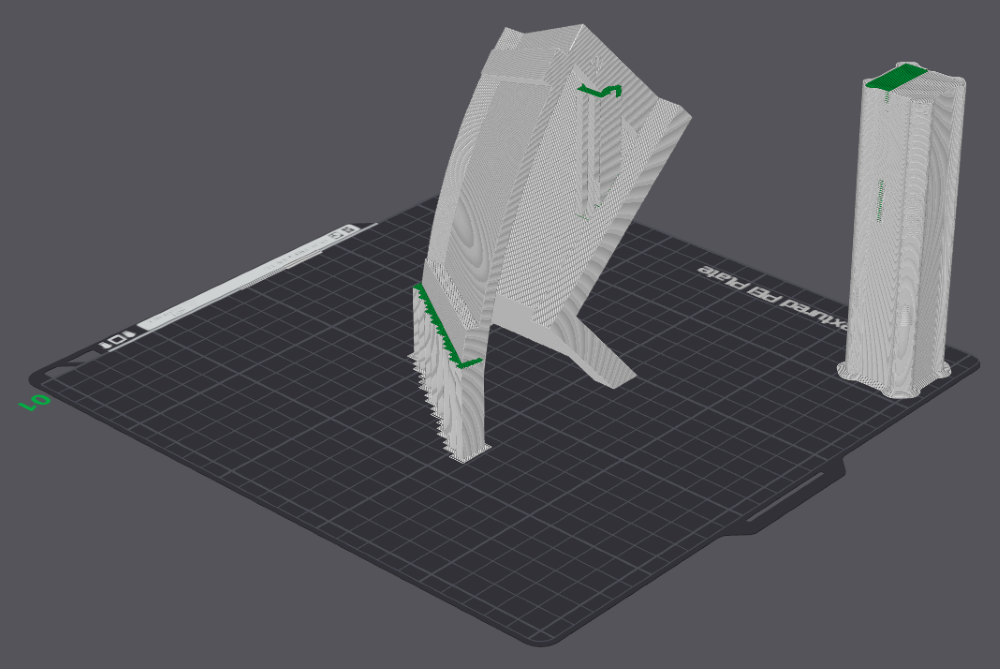
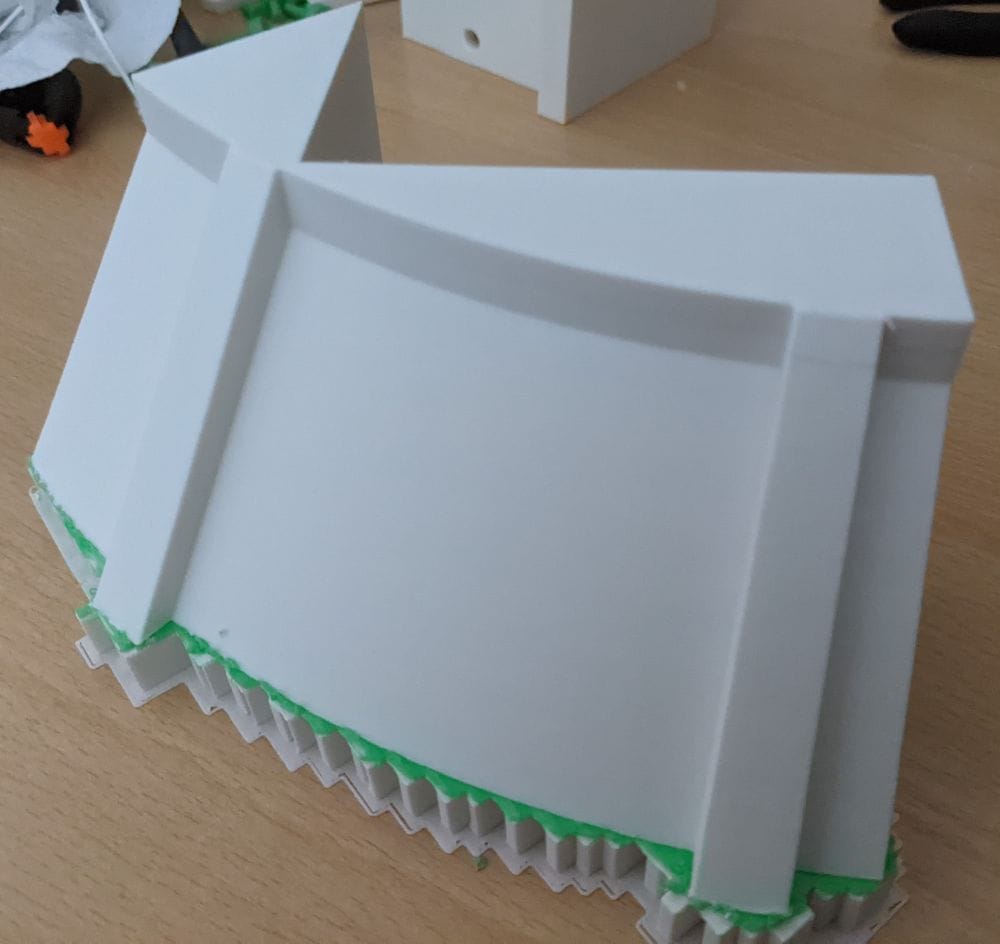
Thankfully, it printed absolutely beautifully. The supports did their job, the overhangs came out cleanly, and the part looked far better than I expected after all the time spent worrying about it. Sometimes the longest part of 3D printing is not the print itself, but working out how to print the part in the first place.
With the orientation problem solved and a successful print completed, I felt much more confident about tackling the remaining skirt sections. One advantage of spending the extra time experimenting was that I now had a much better understanding of how these parts wanted to be positioned on the print bed.
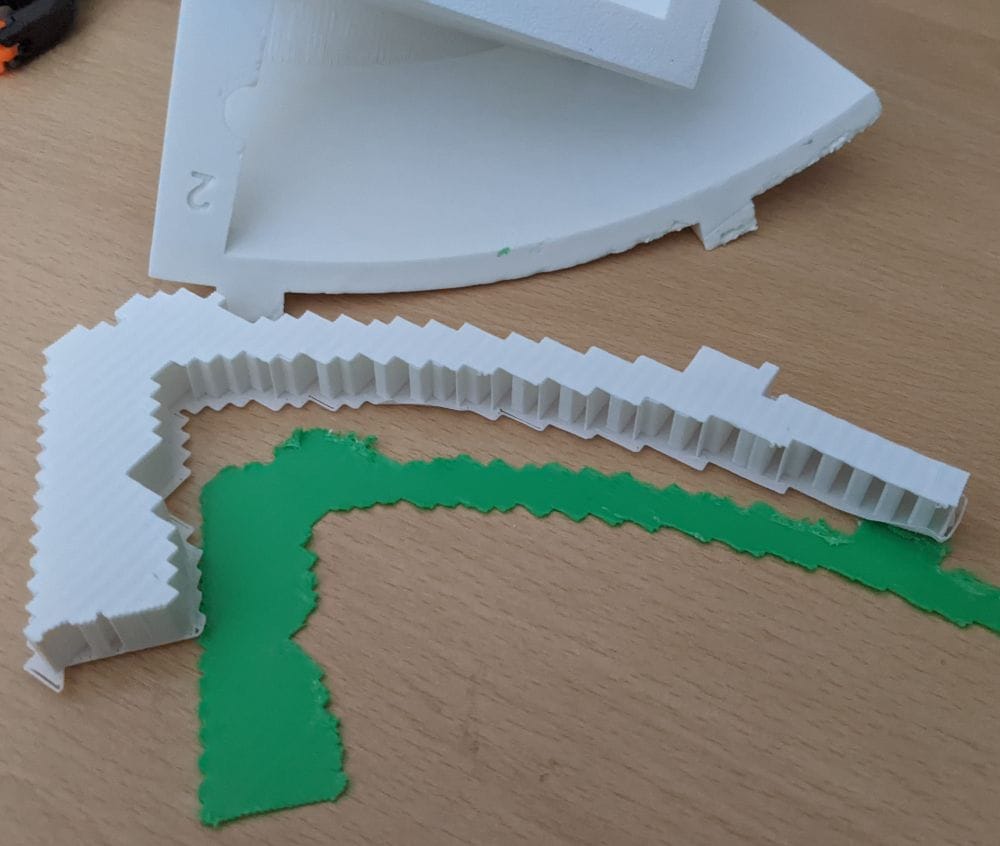
The PETG support interface had worked exactly as intended, providing support where needed while still separating cleanly from the PLA once the print was finished. The supported surfaces came out looking good, and support removal was far easier than with traditional supports printed from the same material.
Having found an orientation that reduced print time, minimised support use, and still produced an excellent result, there seemed little reason to change the approach. Rather than reinventing the wheel for every part, I decided I would continue using this same method for the remaining skirt sections wherever possible.
It's one of those small milestones in a build where you feel you've solved a problem and can move forward with confidence. The skirt parts may still be complex, but at least I now have a proven printing strategy to work from.
As each skirt section came off the printer, I would do a quick test fit with the previous part before moving on to the next print. During these checks, I noticed something quite interesting.
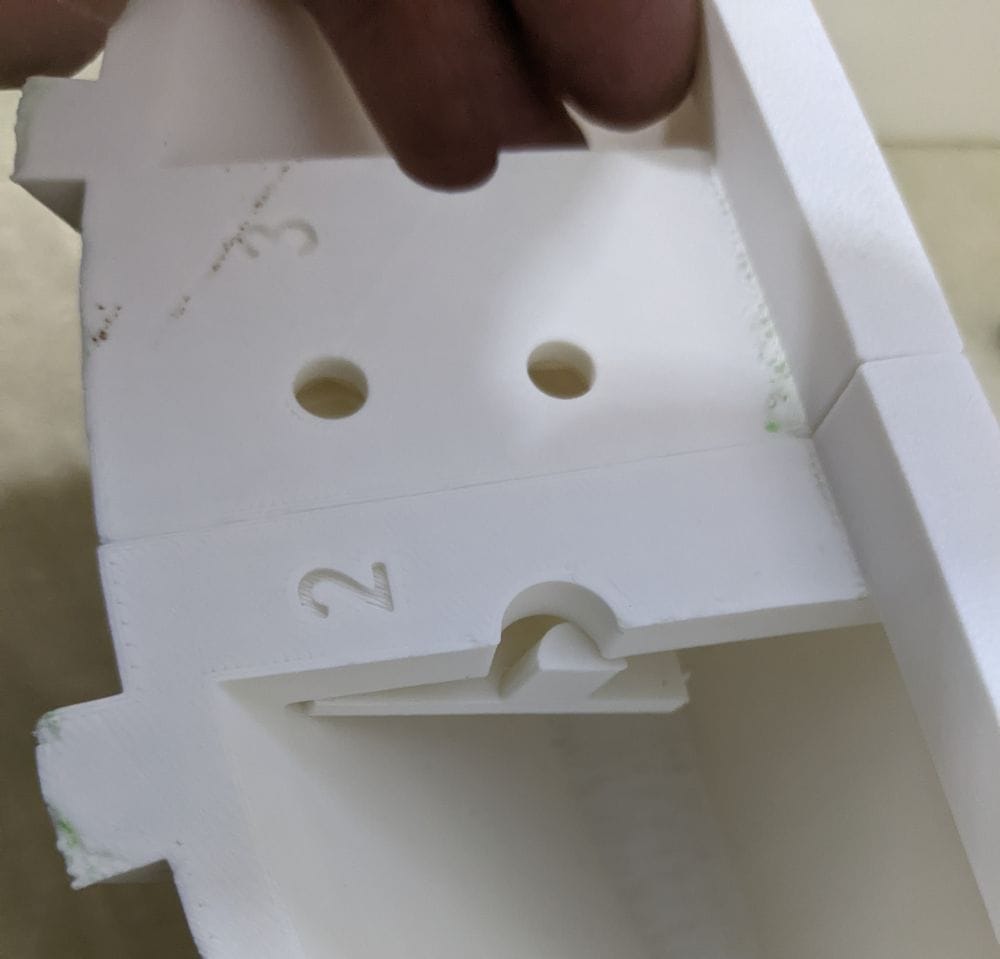
Throughout the main body build, many of the parts included small alignment holes designed to accept short lengths of filament. The idea is simple enough: insert pieces of filament into the holes and they act as locating pins, helping to line the parts up and adding a little extra strength to the joint. In theory it was a great idea, but in practice I found that almost none of the holes were the correct size. The filament would not fit into them, and I would have needed to drill the holes out first. After a while I simply stopped bothering with them and relied on careful alignment during gluing instead.
The skirt sections, however, were a completely different experience. When I tested the first few parts together, I found that the alignment holes were almost perfectly sized. Short lengths of filament slipped into place with little effort and provided an immediate and positive location between the parts.
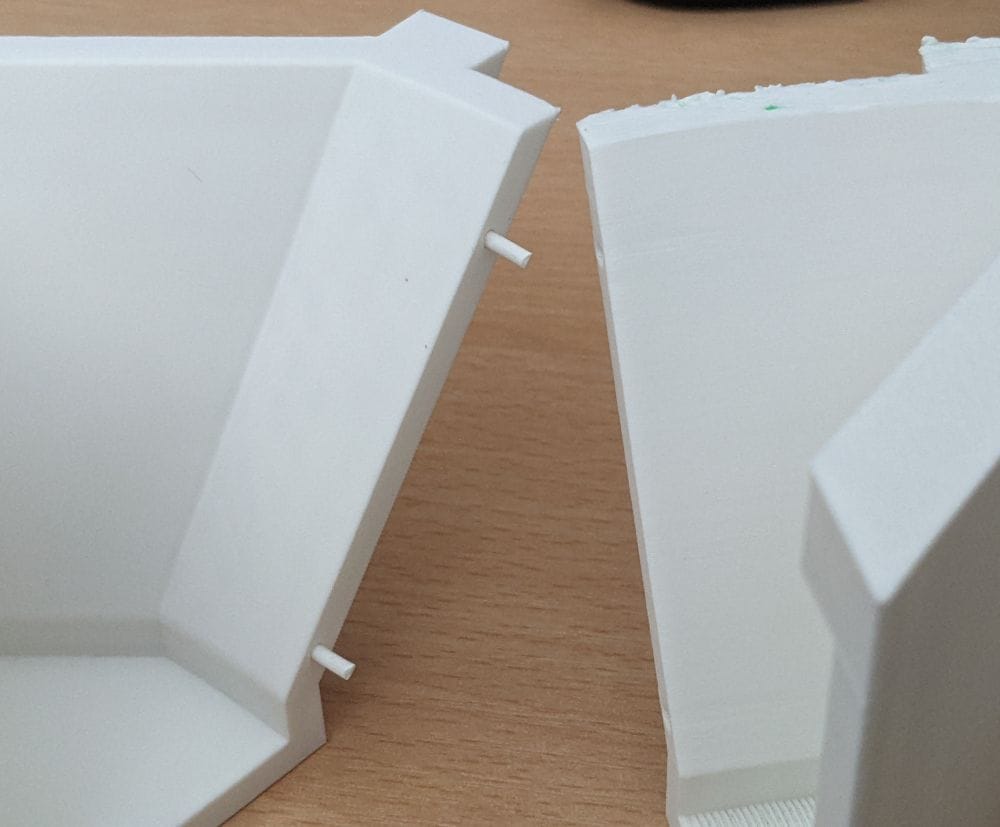
What surprised me most was how well they worked. The filament pins didn't just help with alignment; they actually held the sections together remarkably well during test fitting. In some cases the parts stayed together firmly enough that I could handle the assembly without everything immediately falling apart.
It was a small detail, but one that made assembling the skirt look far less daunting than I had expected. After largely ignoring the filament alignment system throughout the main body build, it was nice to finally see it working exactly as intended.
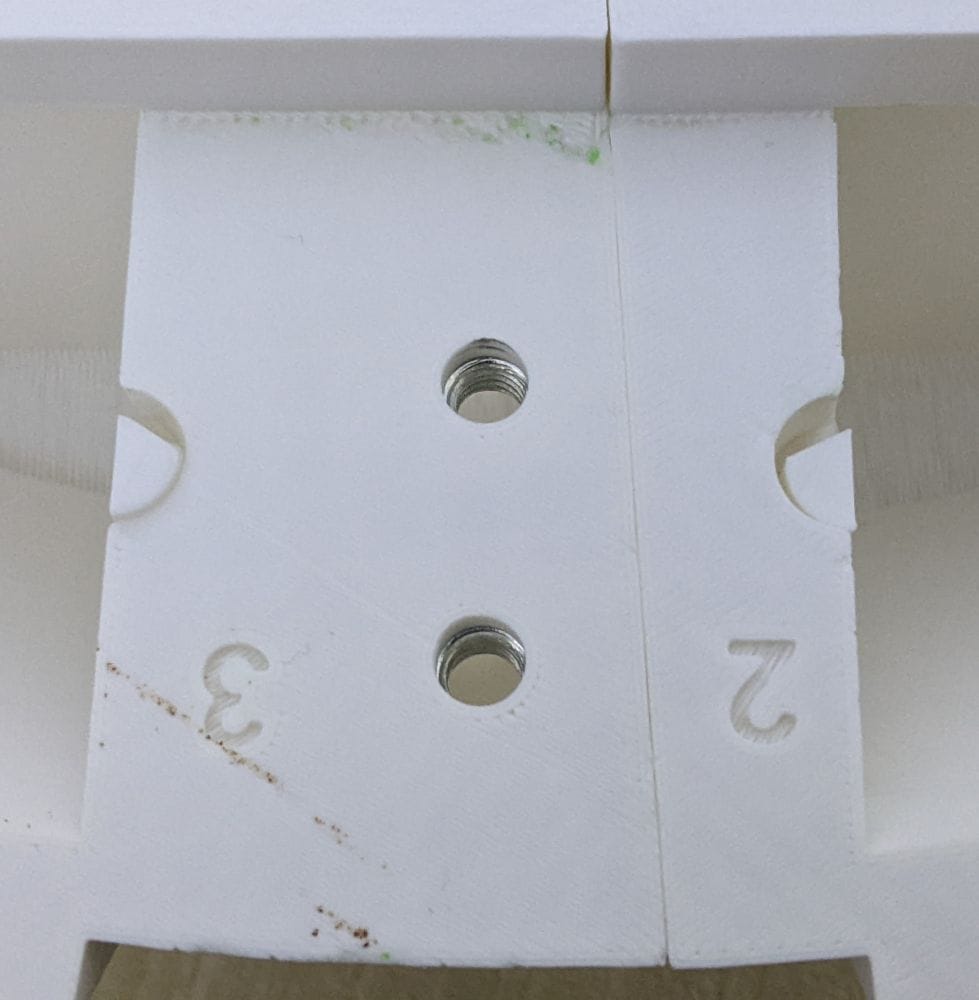
Once all of the skirt sections had been printed, I couldn't resist seeing how well everything fitted together. Having discovered that the filament alignment pins actually worked on these parts, I decided to make full use of them during the test assembly.
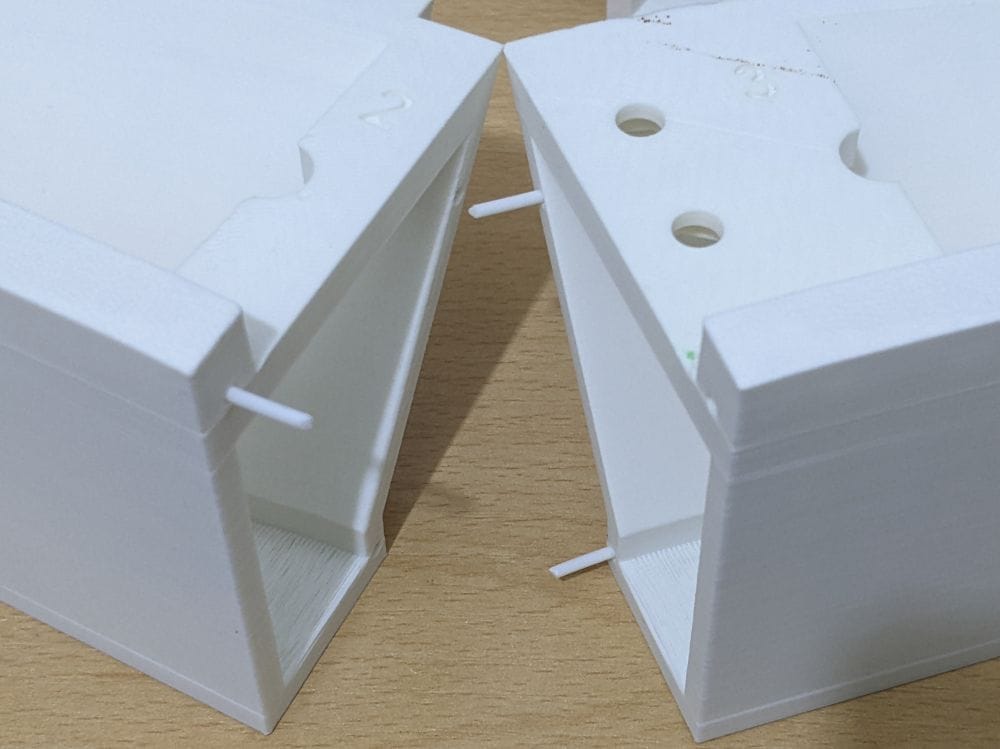
Rather than cutting the filament pins to their final length straight away, I started by leaving them slightly longer than I thought they needed to be. This turned out to be a useful approach. If two sections wouldn't quite pull together properly, I could simply remove the pin, trim a little off the end, and try again. After a couple of adjustments, the parts would usually fit together nicely while still benefiting from the extra alignment provided by the pin.
Most of the skirt sections accepted the filament pins exactly as intended, making assembly surprisingly straightforward. The pins helped keep everything lined up and reduced the amount of juggling needed when test fitting multiple sections together.
There were a few exceptions, however. A couple of parts had holes that weren't quite good enough to use the filament pins effectively. Whether due to slight printing tolerances or minor imperfections in the holes, the pins simply weren't practical to use in those locations. In those cases, I fell back to the same method that had served me well throughout the rest of the build: rehearse the fit, apply the glue, position the parts carefully, then hold everything in place until the bond set.
Fortunately, there were only a couple of sections where this was necessary. The vast majority of the skirt went together using the filament pins, and it was satisfying to finally see a part of the model where the alignment system worked exactly as designed.
With the filament pins doing exactly what they were designed to do, assembly of the skirt turned out to be far easier than I had anticipated. The pins held the sections in the correct position, making alignment straightforward and removing much of the guesswork that I had experienced with some of the earlier parts of the build.
I began by gluing the sections together to create two separate halves of the skirt. Working this way made the assembly much more manageable, allowing me to concentrate on getting each joint aligned correctly before moving on to the next. The filament pins kept everything located while the glue set, which meant there was very little movement between the parts.
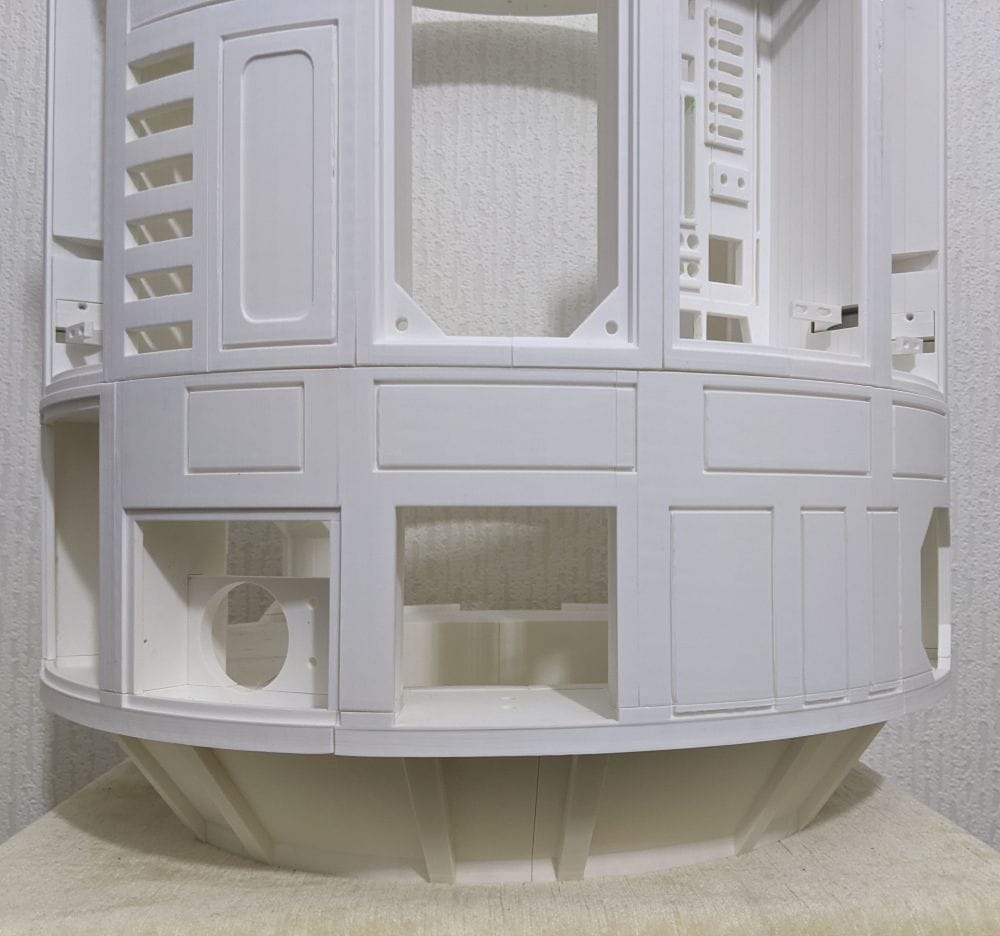
Once both halves were complete, it was time for the moment of truth. I carefully brought the two assemblies together and glued them into a single skirt section. Given the number of individual parts involved, I half expected to find a slight mismatch somewhere around the circumference, but to my surprise everything came together beautifully.
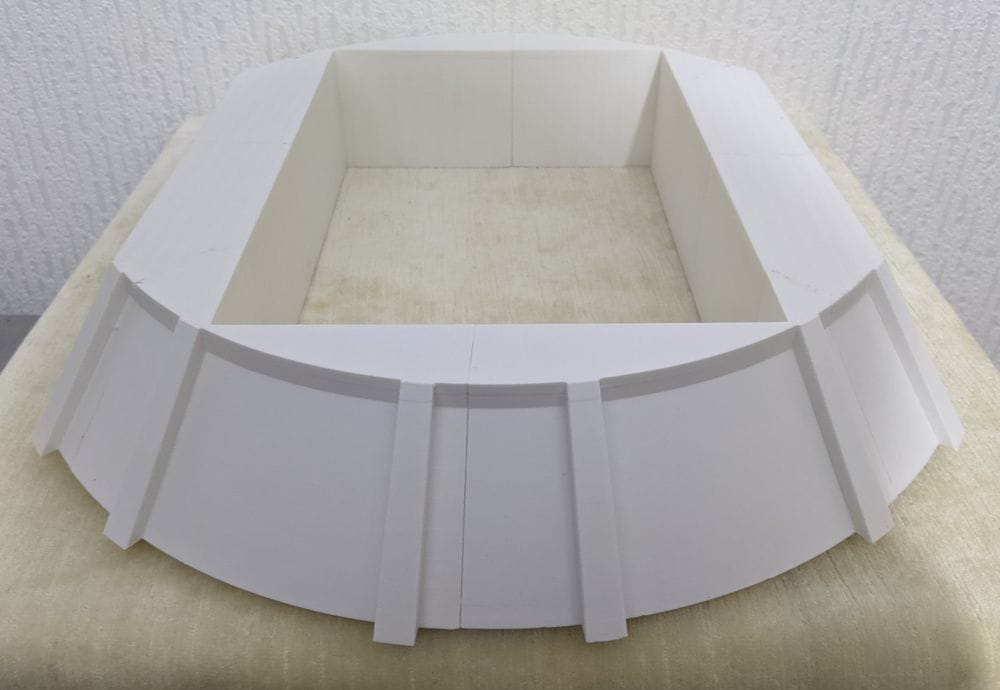
Turning the skirt over and inspecting it from underneath was particularly satisfying. The joints lined up cleanly, the curves flowed smoothly from one section to the next, and there were no obvious steps or misalignments. After all the time spent printing, test fitting, trimming pins, and checking alignment, it was rewarding to see the completed skirt fit together so accurately.
For the first time, it really started to feel like a major section of R2-D2 rather than a collection of individual printed parts.
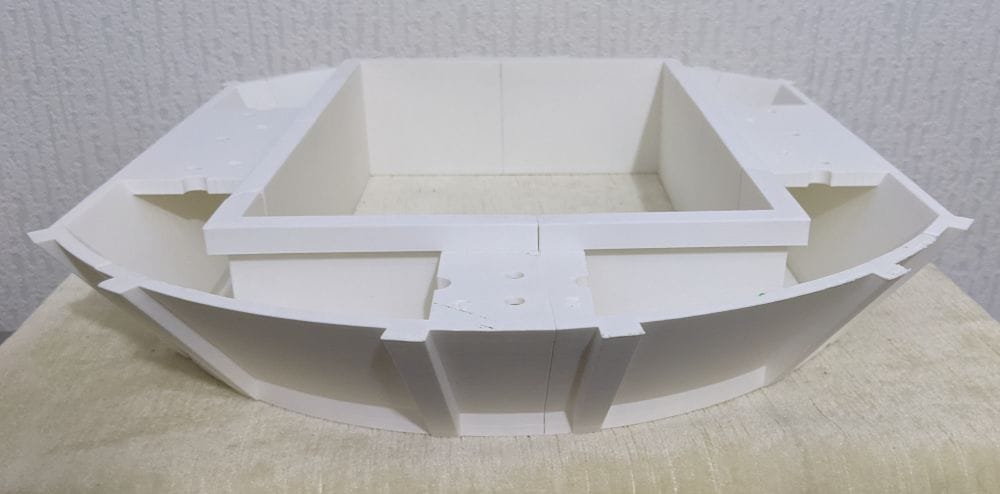
With the skirt fully assembled, there was one test I had been looking forward to ever since printing the first section. I carefully placed the main body base ring onto the top of the skirt to see how well the two assemblies would fit together.
Although the individual skirt sections had lined up perfectly during assembly, there was still a small part of me expecting to find a slight mismatch somewhere. After all, both assemblies were made up of numerous printed parts, and even small inaccuracies can add up over a large structure.
Thankfully, my concerns were completely unfounded.
As soon as I lowered the base ring into position, it became obvious that everything had come together exactly as intended. The fit was beautiful. The curves matched perfectly, the diameter was spot on, and the base ring sat neatly on the skirt without any forcing, twisting, or persuasion.
It was one of those rewarding moments that make all the preparation worthwhile. After spending hours printing, cleaning, test fitting, trimming filament pins, and carefully gluing each section together, seeing two major assemblies fit so well together was a real confidence boost.
For the first time, I could properly appreciate the size and shape of the lower body. Rather than looking at separate components spread across the workbench, I was now looking at a recognisable section of R2-D2 taking shape, and it was difficult not to feel pleased with how well everything had turned out.
Although it was tempting to start gluing the main body rings together at this stage, there was still an important job to complete first. The base ring and skirt are designed to be joined using bolts and captive nuts, allowing the two assemblies to be securely fastened together before the rest of the body is permanently assembled.
To make this work, I first needed to install the nut holders. These small printed parts are designed to capture the nuts and prevent them from turning while the bolts are tightened. On paper it looked like a straightforward task, but in practice this was where I encountered a few unexpected issues.
Up until this point, the skirt assembly had gone together remarkably well. The filament alignment pins had worked perfectly, the skirt sections had fitted together accurately, and the base ring had sat on top exactly as intended. Installing the nut holders seemed like it should be one of the easier jobs remaining.
Unfortunately, that wasn't quite how it turned out.
The three nut holders on the left side and the three on the right fitted perfectly. The nuts dropped into place, the holders clipped in as intended, and I had no problems at all with those six mounting points.
The trouble started with the two mounting points at the front of the skirt and the two at the back. Here, the nut holders simply wouldn't fit correctly. After a bit of investigation, I discovered the problem wasn't with the nut holders themselves but with the shape of the skirt. The curved profile of the skirt in these locations prevented the locating lugs on the nut holders from fully engaging with the corresponding slots in the skirt.
At that point I had two choices. I could modify the design and reprint the affected parts, or I could find a simpler solution. Since these parts would be completely hidden once the build was assembled, there seemed little point in spending hours redesigning and reprinting them.
Instead, I took the pragmatic approach. Using a sharp knife, I carefully trimmed the interfering sections of the nut holders until they fitted properly. It only took a few minutes, and once installed they performed exactly the same function as the unmodified versions.
Sometimes it's worth striving for perfection, but sometimes the sensible solution is simply to make a small adjustment and move on. In this case, a little careful trimming saved a lot of unnecessary reprinting, and the finished result was completely invisible once assembled.
Summary
The skirt turned out to be one of the more enjoyable sections of the build so far. Although some of the parts initially looked intimidating, most of the challenges were solved simply by spending a little time experimenting with print orientation and support placement before committing to a print.
Finding the correct orientation for the PETG interface supports dramatically reduced print times while still producing excellent results. The bridging exceeded my expectations, the visible surfaces came out cleanly, and even the hidden internal areas looked far better than I had anticipated.
Perhaps the biggest surprise was the filament alignment system. Throughout the main body rings, the alignment holes had generally been too tight to use without drilling, so I had largely ignored them. On the skirt, however, they worked exactly as intended. The filament pins made test fitting and assembly much easier, helping to keep everything aligned while the glue set and contributing to a skirt assembly that came together remarkably accurately.
Apart from the minor issue with the front and rear nut holders, which were quickly resolved with a little trimming, the entire skirt assembly went together smoothly. Seeing the completed skirt and then placing the base ring on top for the first time was a particularly satisfying moment, confirming that all the printing, fitting, and gluing had paid off.
With the skirt now complete and the captive nuts installed, the lower body of R2-D2 is really beginning to take shape.
The next stage of the build will be the centre leg supports, which mount directly onto the skirt. At first glance they look like fairly straightforward structural parts, but as I would soon discover, they would introduce a few challenges of their own.