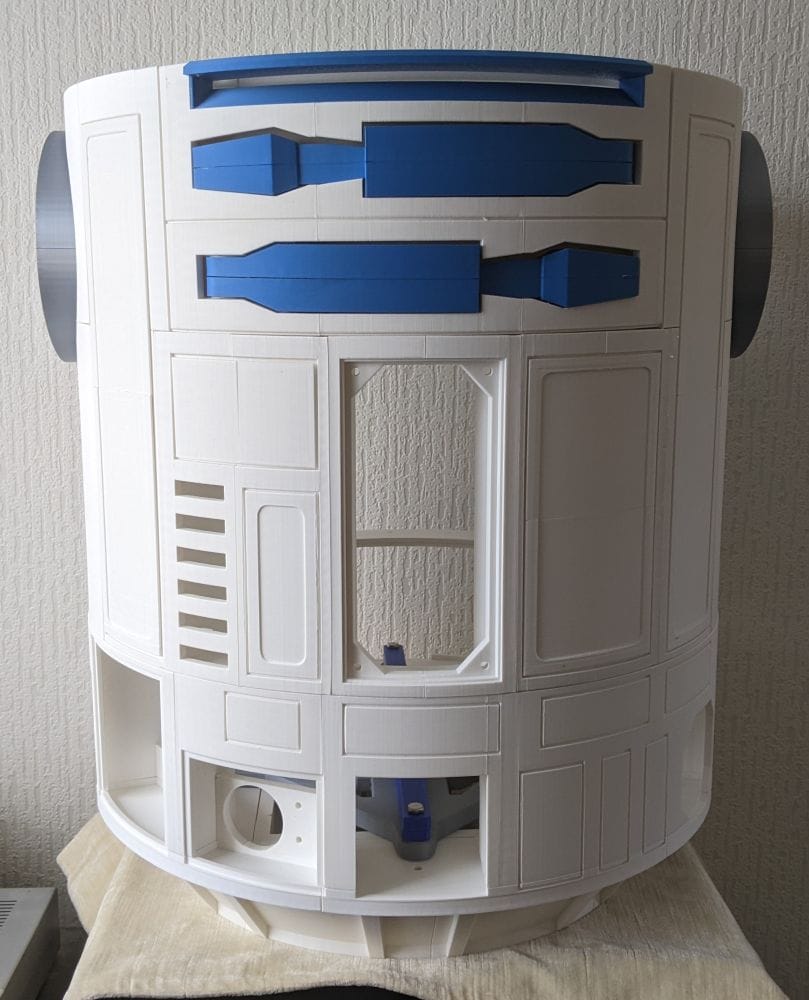
R2-D2 Part 9: Doors and Hinges
Printing and fitting the R2-D2 body doors proved more challenging than expected. From experimenting with print orientations to carefully aligning the hinges, this stage involved plenty of trial and error before achieving doors that opened, closed, and fitted correctly.

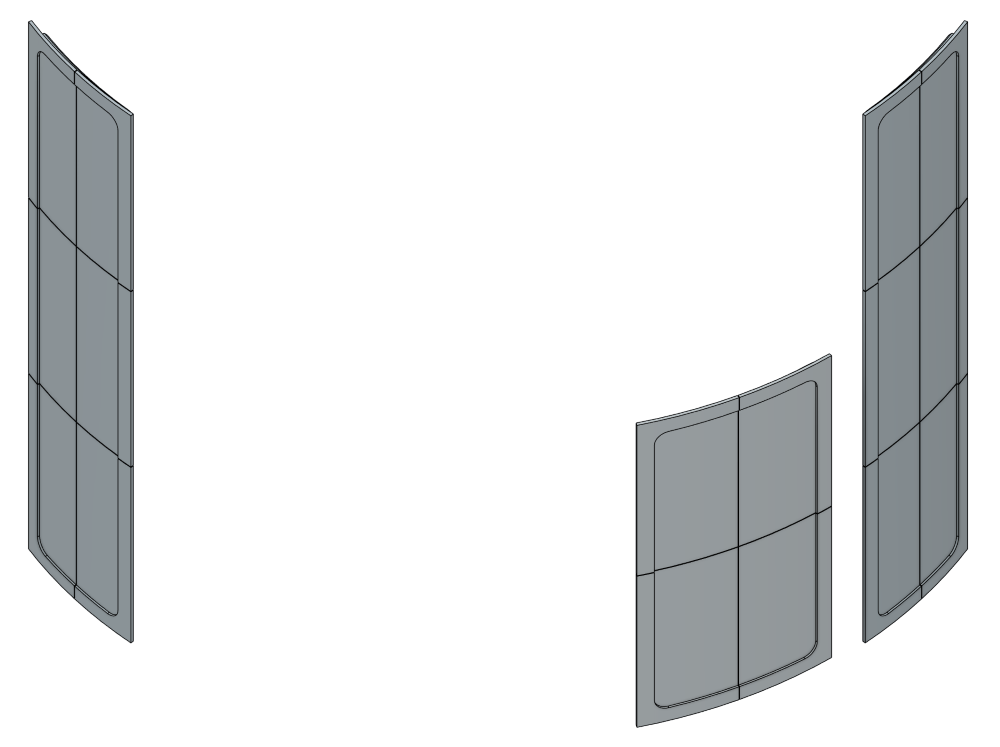
The Doors and Hinges
I had actually printed most of the hinges much earlier when I was building the main body, as they needed to be installed before the body sections were permanently glued together. The doors, however, were a different matter. I'd been putting them off for quite a while.
The main reason was uncertainty over how best to print them. Each door is made up of several parts, and because of their curved shape I wasn't entirely sure which orientation would give the best results. My first thought was to print them lying flat on the build plate, but this required a large amount of support material. Not only would this significantly increase print times, but I was also concerned about the amount of clean-up that would be needed afterwards and the effect it might have on the visible surface finish.
After quite a bit of experimenting and staring at the slicer, I eventually decided that printing the doors vertically would likely produce the best overall result. The downside was that the doors are both tall and relatively thin, which always makes for a slightly nerve-racking print. My concern was whether the printer could handle such a tall, narrow part without it wobbling during printing or, even worse, coming loose from the build plate several hours into the job.
One option provided in the files was to print each door in four separate pieces: two main sections joined vertically, along with two smaller edge sections. While this would have made the parts easier to fit on the print bed, it seemed like an odd approach to me and would have introduced additional glue joints that I would rather avoid if possible.
I also looked at printing the doors as full-size single pieces, but they simply wouldn't fit on the build plate in their original orientation. To get around this, I used the slicer's cut function to divide the doors in half and create a flat edge. This allowed me to stand the parts vertically on the build plate while maintaining large single-piece sections.
So far, the approach appears to be working well. The prints have started successfully and seem stable enough, but with long prints like these there's always that lingering uncertainty until the final layer is complete. For now, all I can do is wait and see whether my gamble on the vertical orientation pays off.
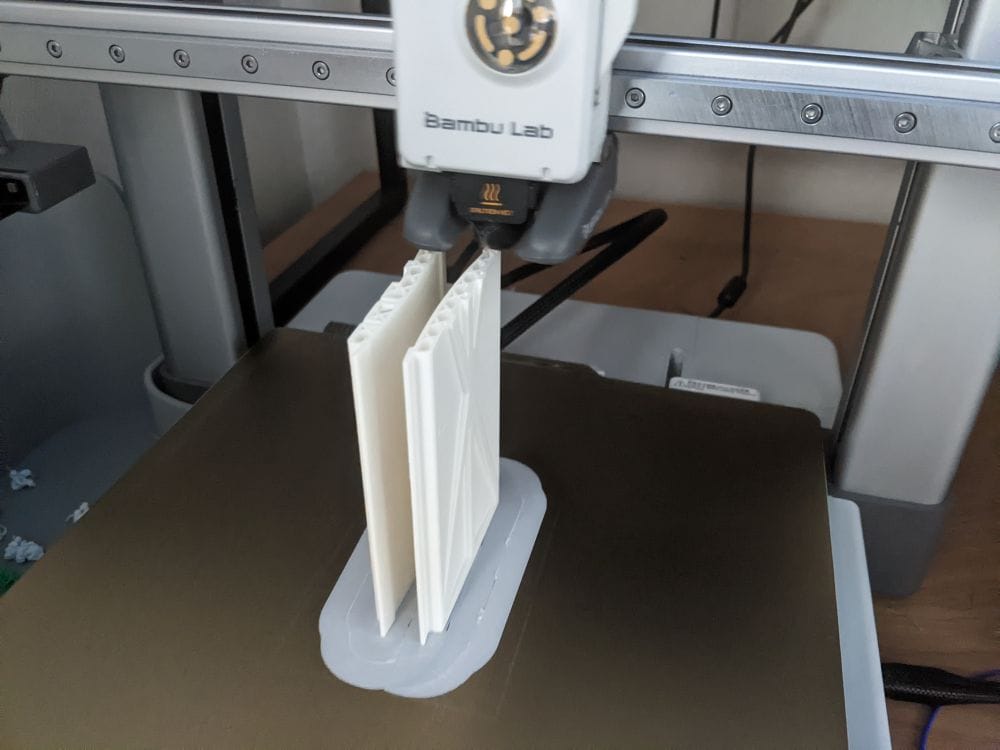
The photo shows one of the door sections partway through printing. Every time I walked past the printer I found myself checking to make sure it was still standing. A print this tall and thin always feels like it's tempting fate, but thankfully the Bambu A1 seems to be handling it without any drama so far.
I was genuinely surprised that the doors completed printing without falling over. Given how tall and thin they were, I had been expecting at least some issues before the print finished. Thankfully, both sections remained firmly attached to the build plate and completed successfully.
Once the prints were finished, I removed them from the build plate and carefully cleaned away the brim around the bottom edges. Looking closely, I noticed that the upper sections of the prints weren't quite as clean as the lower sections. The edges near the top showed slightly more imperfections, which I suspect was caused by a small amount of vibration or movement as the printer worked higher up the part. Considering the height of the print, the result was still far better than I had expected.
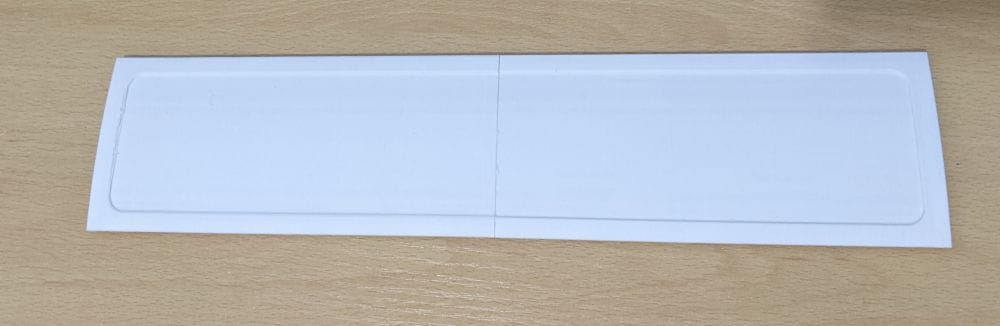
After a little clean-up, I test-fitted the sections together and was pleased with how well they aligned. There is a visible join line where the two sections meet, but that doesn't really bother me. In fact, it blends in quite well with the rest of the build, which already has panel lines and joints throughout the body. Once installed, it should look perfectly at home on the finished R2-D2.
With the success of the first door, I didn't waste any time starting on the second. Using exactly the same printing orientation and settings, the second door printed just as successfully as the first. By this point, I was a lot more confident that the approach worked and that my earlier concerns about the doors toppling over during printing had been unnecessary.
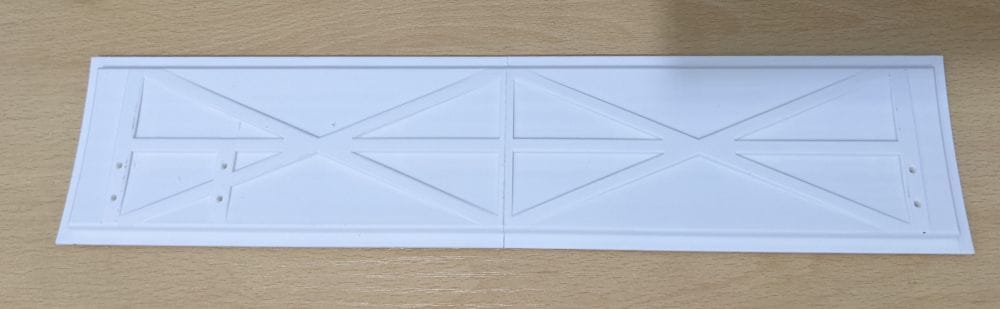
After removing the brim and carrying out the same clean-up process, the sections fitted together nicely and glued without any issues. Just like the first door, there was a visible join line where the two halves met, but it was neat and consistent, matching the appearance of the rest of the build. Having both doors completed and assembled felt like a significant milestone, especially considering how long I had been putting off printing them.
Feeling confident after the success of the first two doors, I decided to experiment slightly when it came to printing door number three. Instead of cutting the model across its width as I had done previously, I tried splitting it lengthways along its full length. In theory, it seemed like a reasonable idea, but in practice it turned out to be a bit of a mistake.
The new orientation didn't provide the same level of stability on the build plate, and during printing the parts began to lift slightly from the bed. The print completed, but the warping affected the fit of the sections, and when I came to test-fit them together, the joints weren't nearly as good as those on the previous doors.
It wasn't a complete failure, but the result fell short of the standard I had achieved with doors one and two. Rather than trying to make do with a part that I knew wasn't right, I've decided to reprint door number three using the original method that proved successful before. Sometimes experimentation pays off, and sometimes it simply confirms that the first idea was the better one.
When it came to fitting and gluing the doors, I ran into another problem. With the door closed, there was no way to reach the hinges to apply the glue. But with the door open, I had no guarantee that I was positioning the hinges correctly. If I glued them even slightly out of place, there was a good chance the door wouldn't sit flush when it was closed.
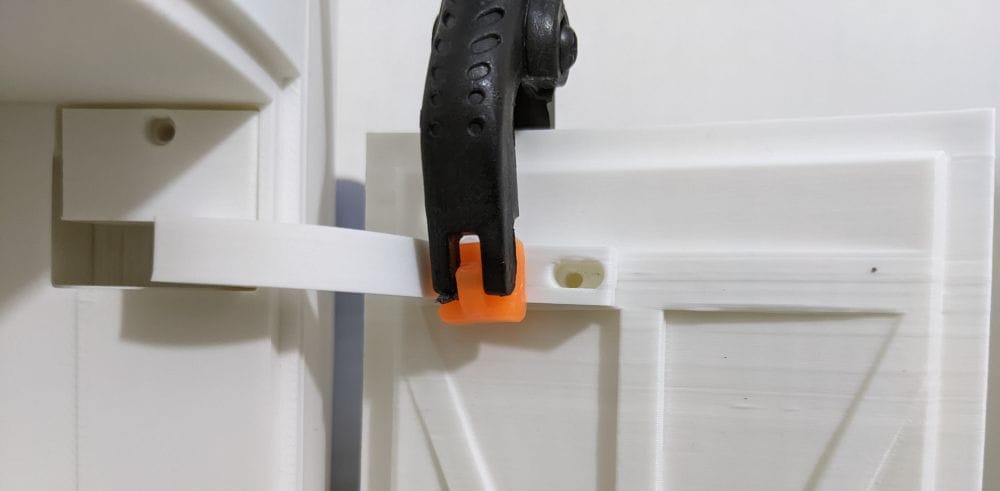
After thinking it through, I came up with a simple solution. As shown in the photo below, I clamped the hinges to the door to hold everything in the correct position. Rather than applying a full amount of glue straight away, I used the smallest possible dab of cyanoacrylate—just enough to tack each hinge in place. The idea was that, if the alignment turned out to be wrong, I could carefully cut or snap the tiny glue joint and reposition the hinge without damaging the door.
Once the temporary glue had cured, I closed the door to check the fit. If everything lined up correctly and the door sat as it should, I could then go back and apply glue permanently, confident that the hinges were in exactly the right position.
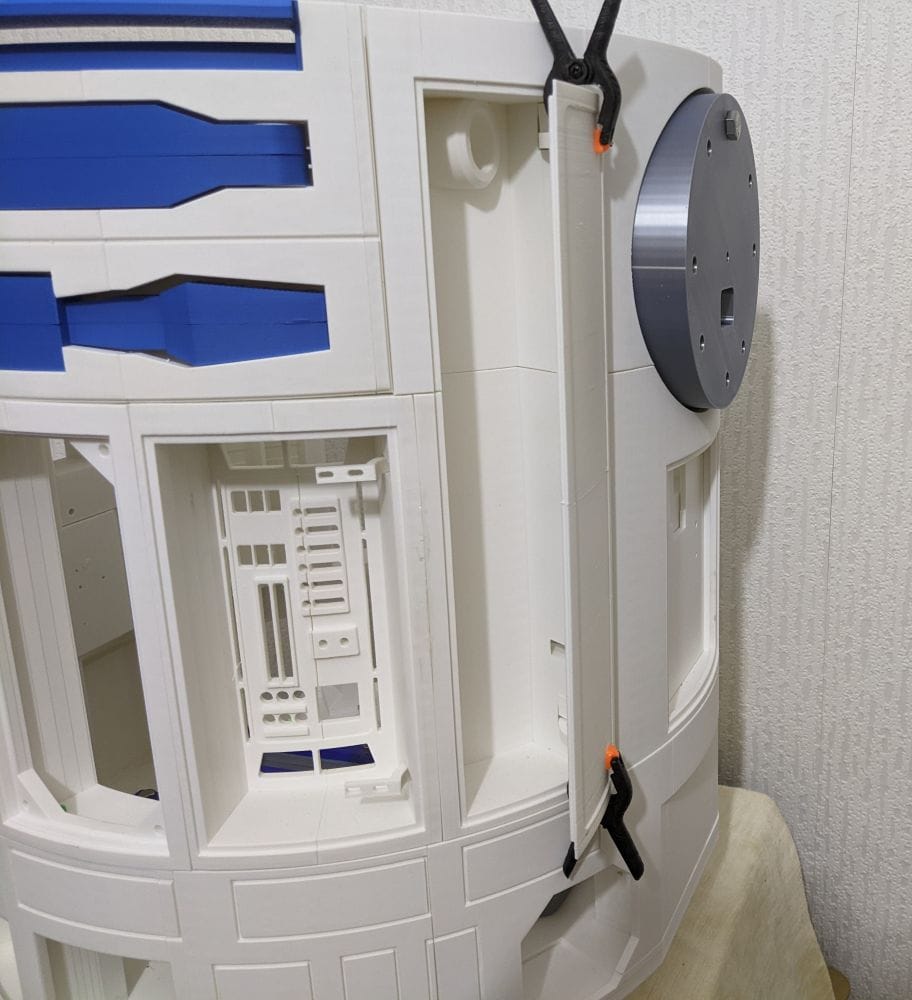
There was actually another way I could have approached it. The door was designed with a hole that appeared to be intended for a fixing screw. Using a screw would have made the alignment process much easier, as I could have loosened it, repositioned the hinge until the door fitted perfectly, and then tightened it again.
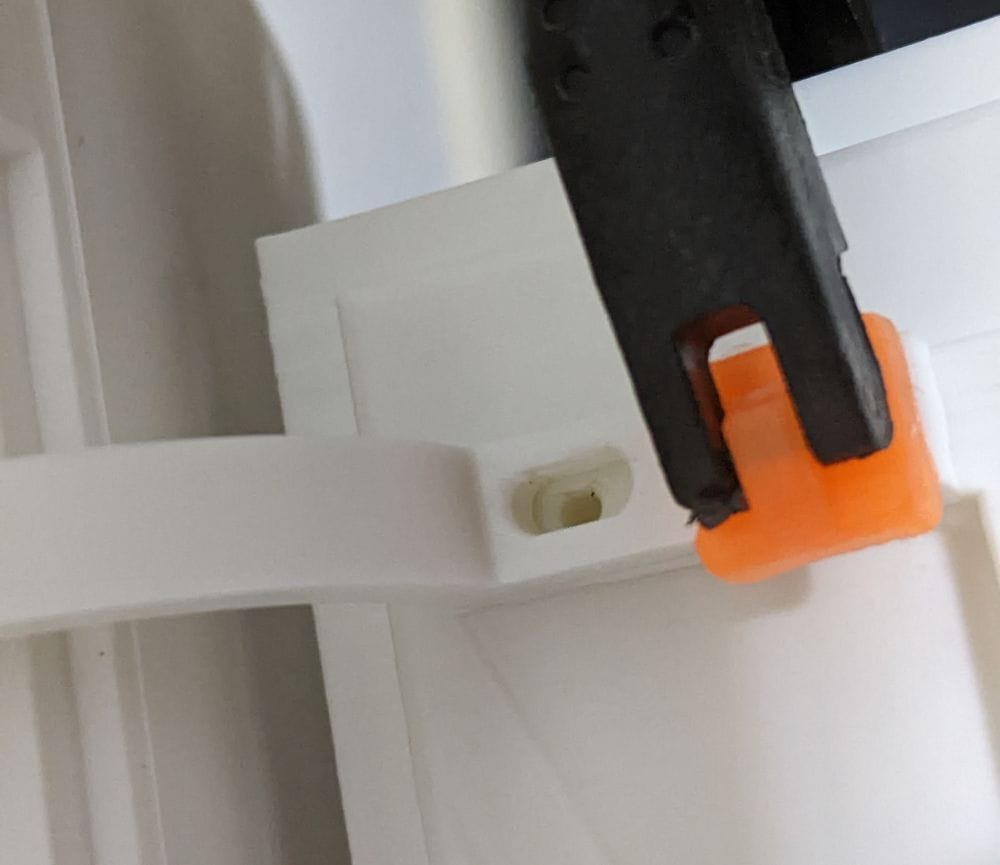
The problem was that I couldn't find any information in the instructions about what size screw was supposed to be used. I could have guessed, but I didn't have a suitable selection of screws to hand and didn't really want to risk damaging the printed parts by using the wrong size. In the end, I decided to stick with the glue method instead.
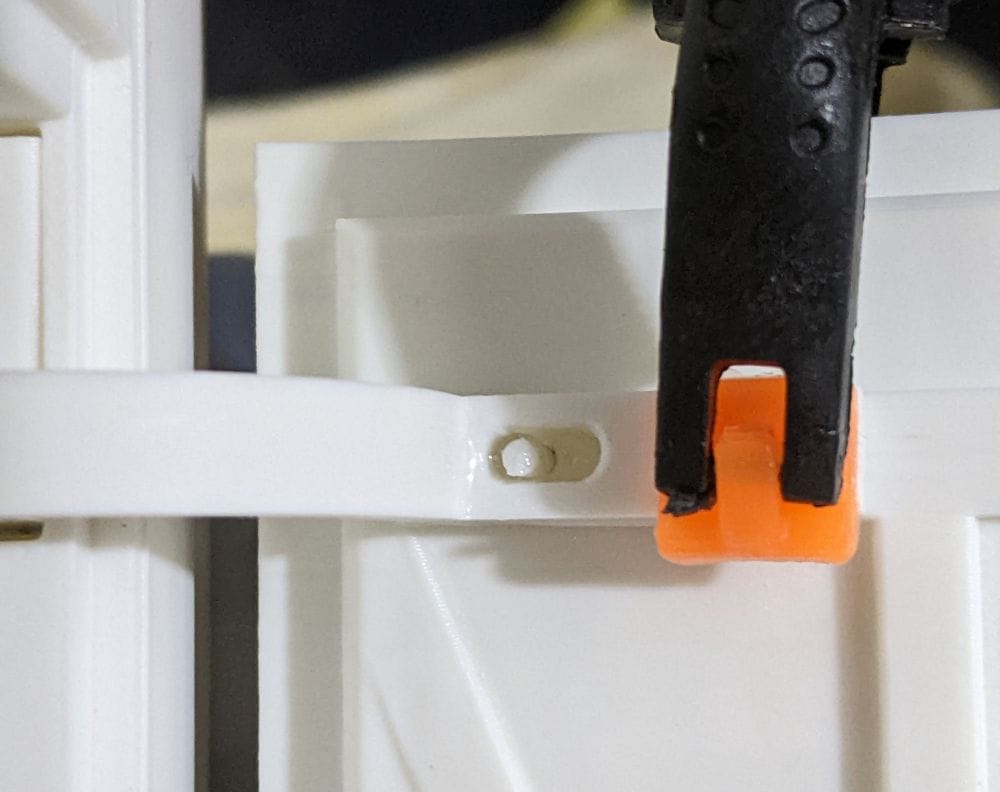
Once I was happy that everything was aligned and the door closed as well as I could get it, I made the joint permanent. I first placed a couple of drops of cyanoacrylate into the hole that would normally have accepted the screw. I then inserted a short piece of 1.75 mm filament into the hole before adding another drop of glue over the top. The filament effectively acted as a solid locating pin, creating a strong permanent joint without needing a screw at all.
It turned out to be a simple solution using materials I already had on hand, and it left the hinges feeling secure while keeping the door correctly aligned.
With the first door successfully fitted, I moved on to the second, following exactly the same process and trying to keep the alignment as consistent as possible between the two.
After the glue had fully cured, I noticed that the second door wasn't quite as well aligned as the first. It sat very slightly out of position, but only by a small amount. It's one of those things that I notice because I know it's there, but anyone simply looking at the finished model would almost certainly never spot it.
Considering everything was aligned by hand rather than with a dedicated jig, I'm more than happy with the result. The door opens and closes as intended, and the slight difference in alignment is so minor that it doesn't detract from the overall appearance of the build.
When it came to fitting the third door, things became much more challenging. Unlike the first two doors, which are mounted on the sides of the body, this one is positioned on the front of the droid, where even the slightest misalignment is far more noticeable.
No matter how carefully I adjusted it, I couldn't get everything lined up perfectly before committing to the glue. Although I could close the door and reach the rear of the opening, access was still awkward, making it difficult to apply the glue accurately while keeping everything in position.
I decided to use the same temporary fixing method as before, applying just a tiny dab of glue to tack the hinges in place so I could check the alignment before making the joint permanent. That way, if the fit wasn't right, I could break the small glue joint, reposition the hinges, and try again without damaging the parts.
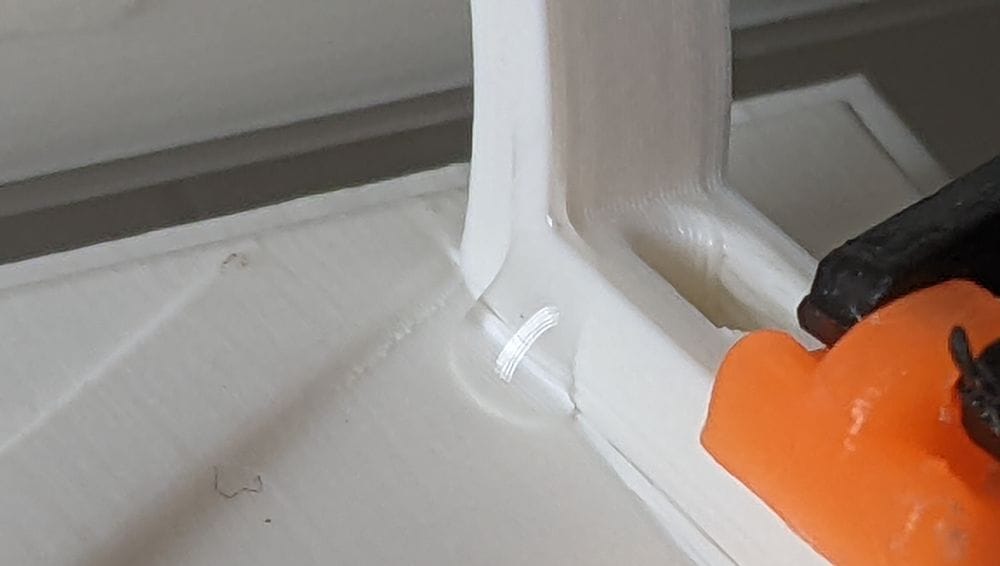
My first attempt was nowhere near as successful as I'd hoped. The door didn't even close. Despite measuring and double-checking everything beforehand, I was still well out with the hinge position. I carefully broke the temporary glue joint, repositioned the hinge, waited for the glue to cure, and tried the door again. This time it closed, but it still wasn't quite right. The door sat slightly out of line and wasn't as straight as it should have been.
Fortunately, I only needed to adjust one of the hinges, as the other one had been positioned perfectly from the start. After making that final adjustment, I closed the door once more and everything lined up exactly as I wanted. With the alignment finally spot on, I was happy to make the fix permanent and glued both hinges securely into place.
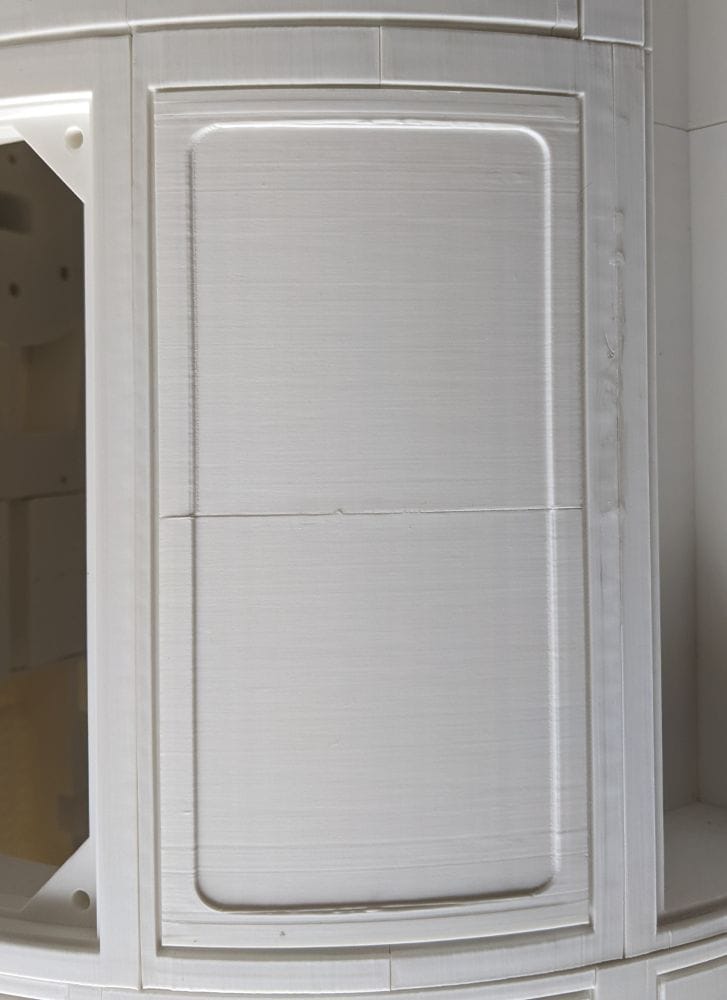
Looking back, I think I made life much harder than it needed to be. In hindsight, this front door would have been far easier to fit before I permanently glued the surrounding parts into the body. With unrestricted access from behind, I could have aligned the door perfectly while it was closed, reached the hinges with ease, and glued them permanently in one go. It's one of those lessons you only really learn after you've reached that stage of the build.
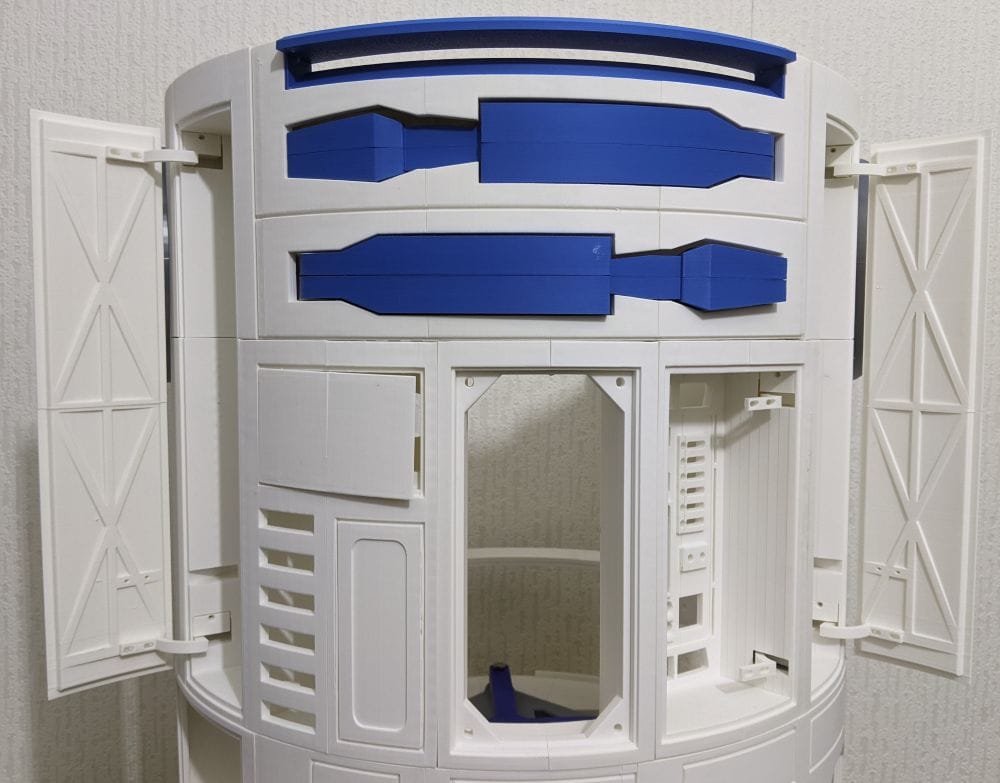
The photographs below show the completed body with all of the doors open, revealing the various compartments and details hidden inside. Although I won't be adding electronics to this build, it's satisfying to see all of the access panels working exactly as they were designed.
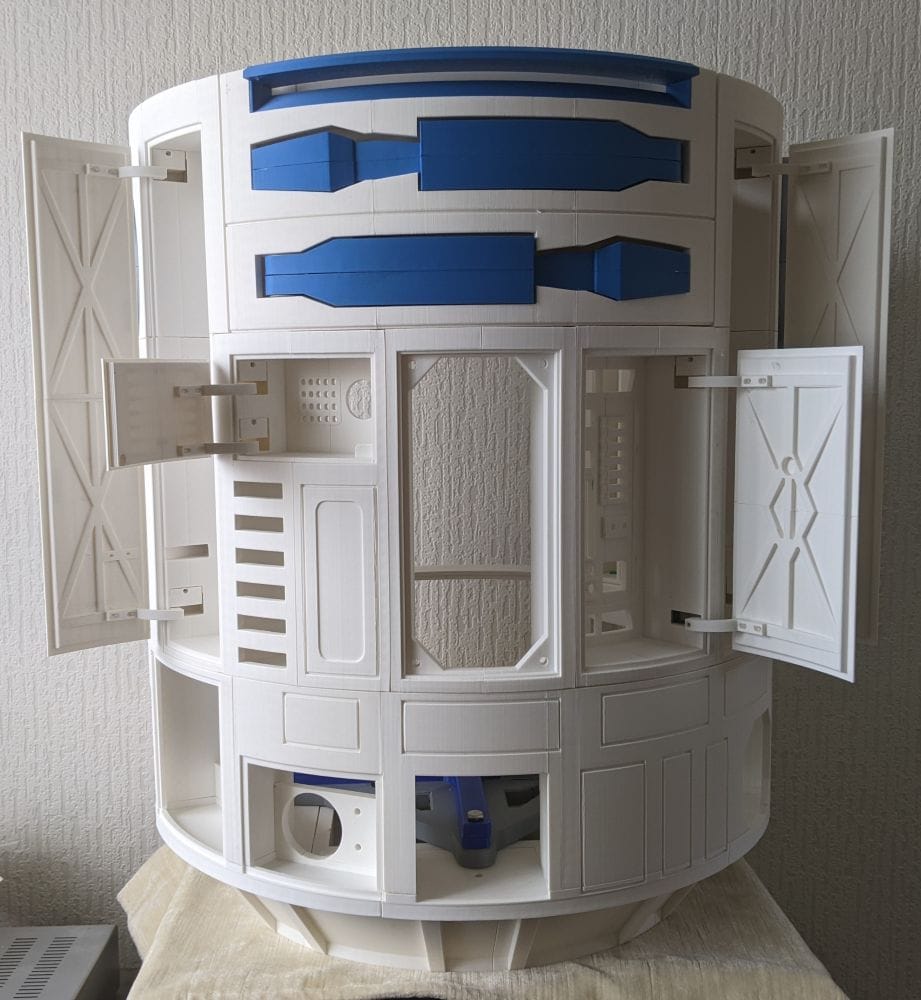
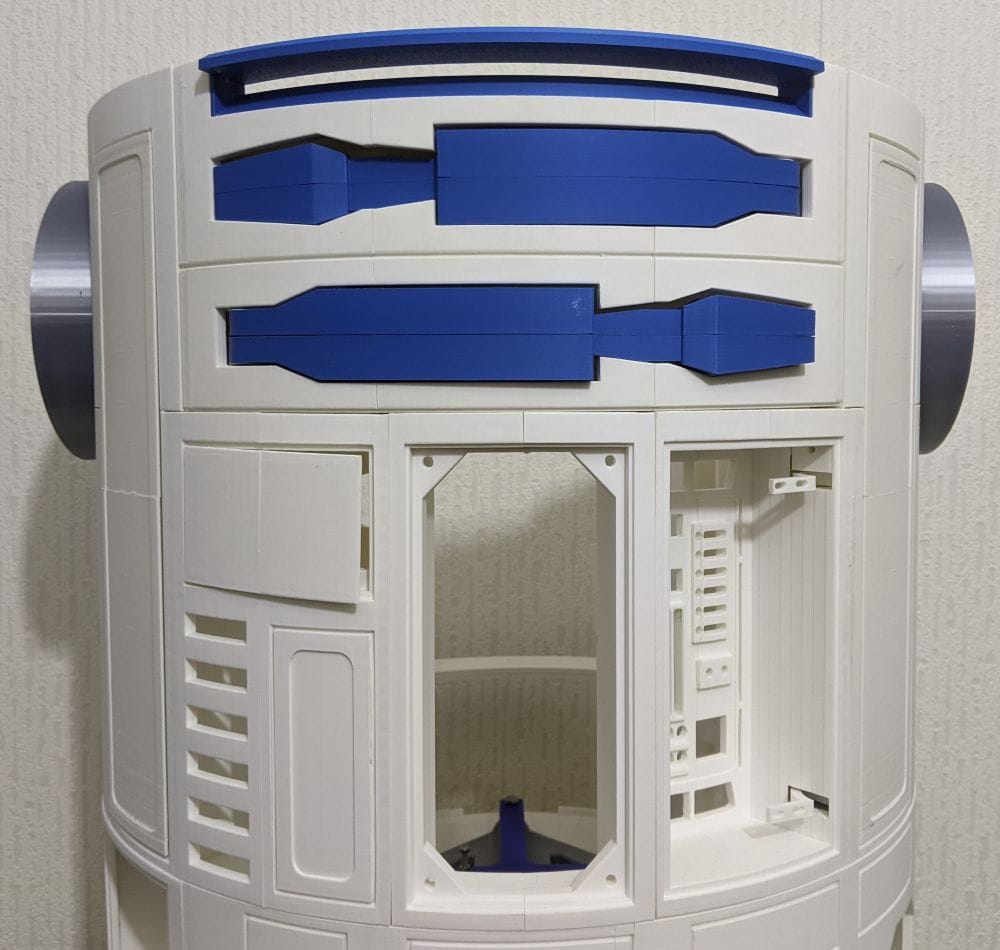
The final photograph shows the opposite view, with every door closed. Seeing the body panels sitting neatly in place really brings the main body together and gives a much better impression of how the finished R2-D2 will look. With this milestone complete, it's time to move on to the next stage of the build.