
R2-D2 Part 1: Base Ring
The base ring was my starting point for the full-size R2-D2 build. Six large printed sections, failed prints, glue problems, reprints, and plenty of lessons learned along the way.
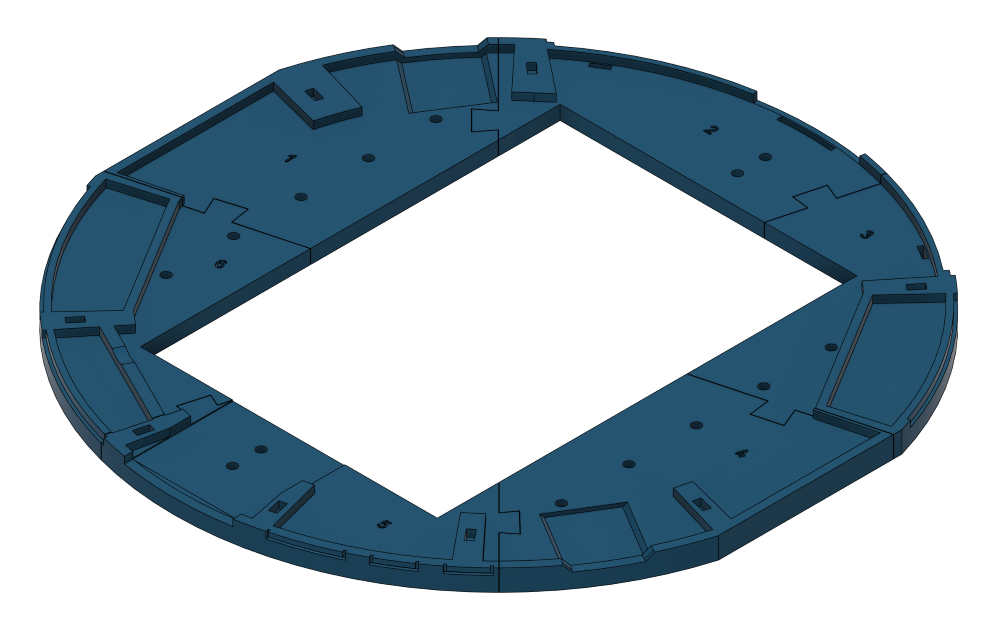
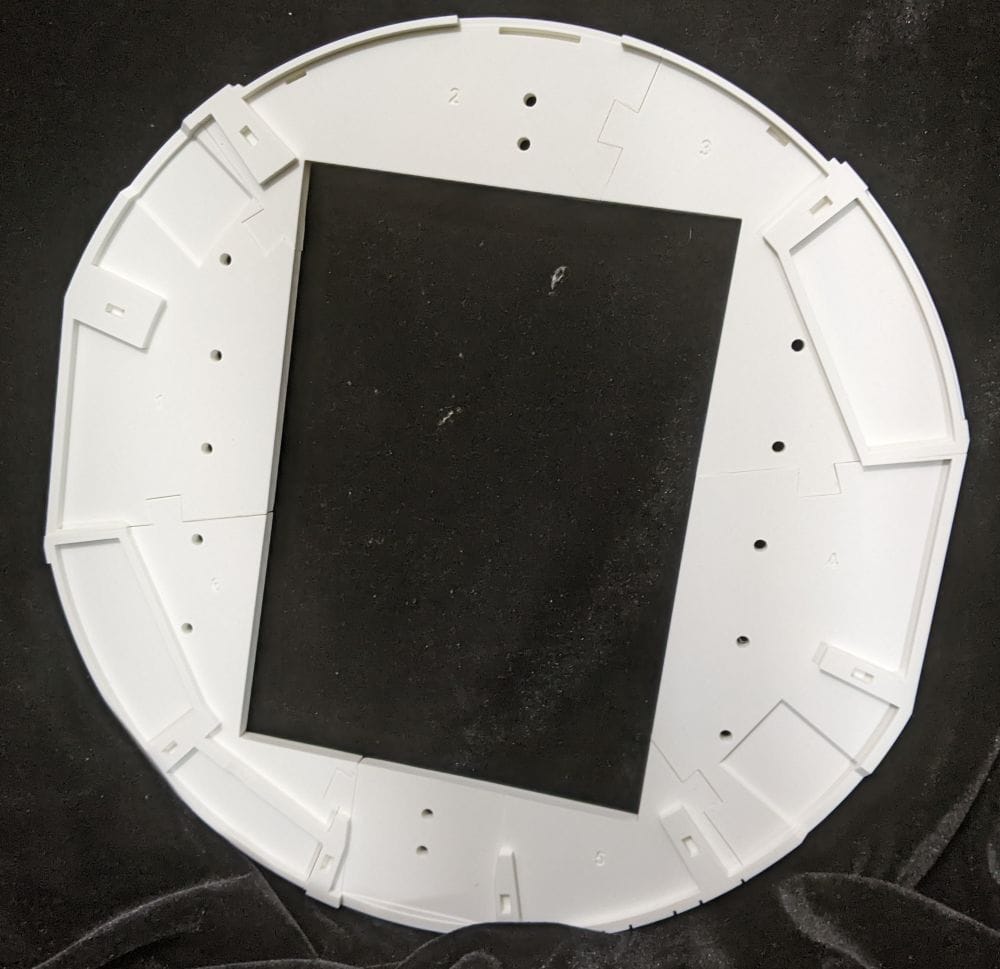
I decided to begin with the base ring. The base itself is made up of six separate parts that slot together using dovetail joints, forming the foundation for everything that stacks on top.
Each section prints flat on the bed with no supports or overhangs required, which makes them nice and straightforward to produce. Overall, the prints came out well, although not completely without issues.
I noticed a few imperfections along some of the curved edges, along with a slight amount of curling on a couple of the corners. Nothing major, but exactly the sort of small issues you tend to expect on larger prints like this — and something I’ll be keeping an eye on as I move through the rest of the build.
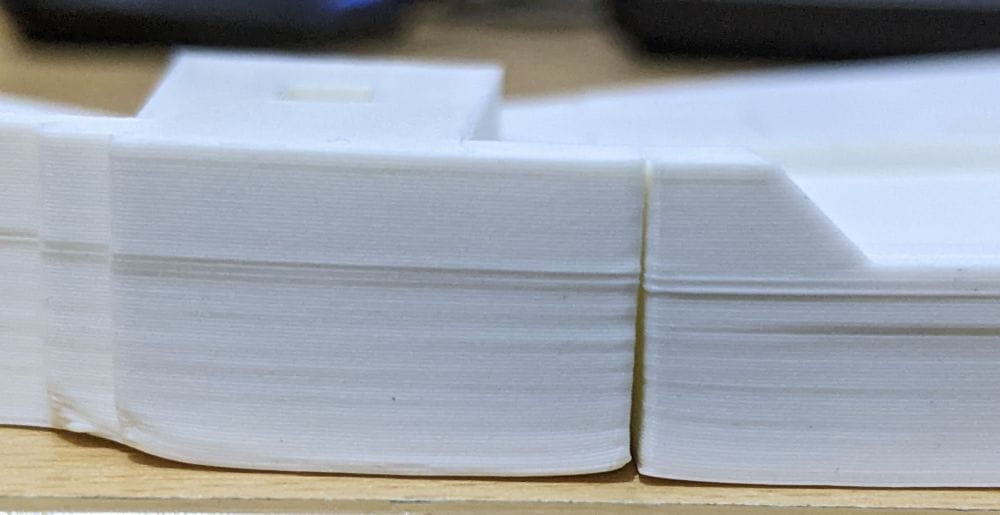
Because of the slight imperfections, I’ll likely need to use a bit of filler when it comes to gluing the sections together to get a clean finish.
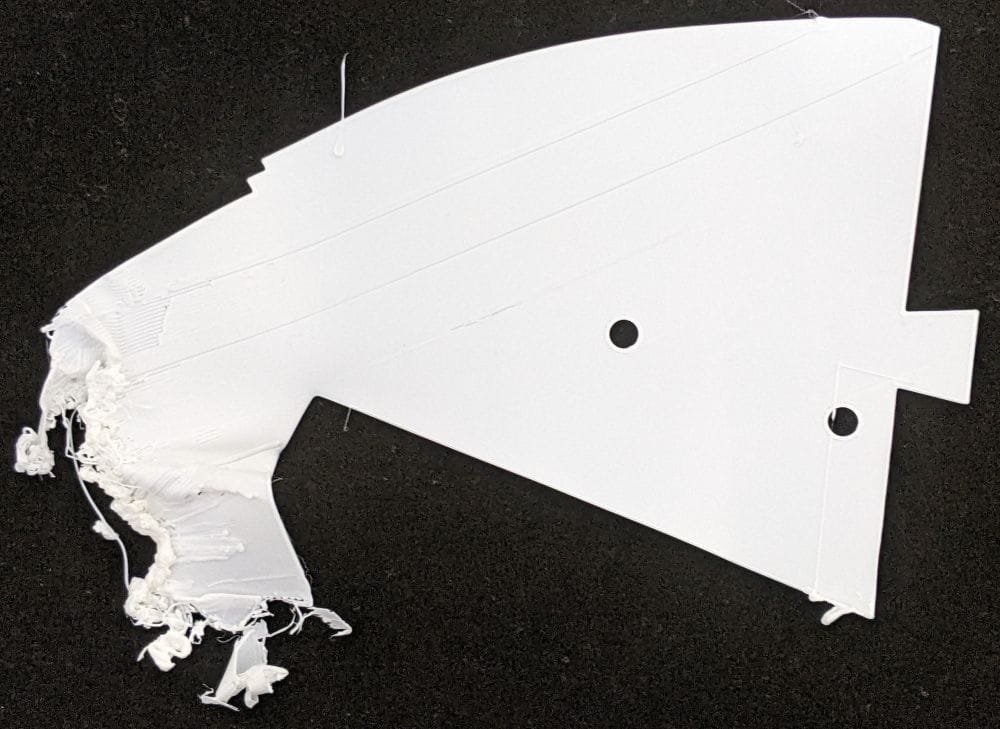
I did run into one failed print early on when one of the parts didn’t stick properly and failed partway through. That turned out to be down to the print bed not being properly cleaned — a simple mistake, but a good reminder of just how important first layer adhesion is, especially on larger prints like these.
After sorting out the adhesion issue, I made a point of cleaning the print bed with washing-up liquid every few prints. That simple change made a noticeable difference, and the remaining sections all printed without any further problems.
With all six pieces completed, the base ring is now fully printed. At this stage I’ve only dry-fitted everything together — nothing has been glued yet — but it already gives a good sense of the overall size of the build and how well the parts line up.

Even at this early stage, the project already feels surprisingly substantial, and it’s easy to start imagining how imposing the finished R2 unit is going to be once the rest of the body is stacked on top.
Gluing the Base Ring
Once I was happy that all six sections fitted together properly, I moved on to gluing the base ring assembly together.
On previous builds, I’d normally used Gorilla Glue Gorilla Super Glue XL, but I found it cured a little too quickly for something this large. With bigger parts like these, there’s a bit more time needed to line everything up properly before the adhesive grabs, so for this build I decided to switch to Gorilla Glue Gorilla Epoxy instead.
The slower curing time seemed like a much better option, giving me enough working time to position the sections correctly and make adjustments before everything set solid. I also picked up a set of small modelling clamps to help hold the parts together while the epoxy cured.
The original plan was simple enough — dispense only a small amount of epoxy for each joint and work through the ring section by section. In practice though, it didn’t quite go as smoothly as I’d hoped.
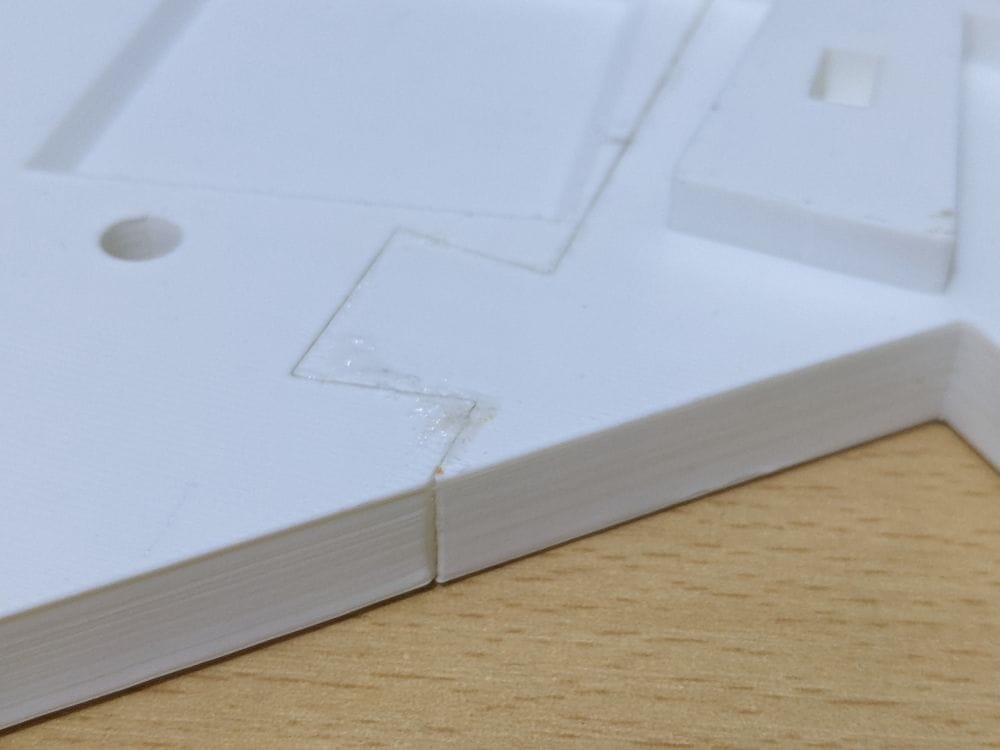
I found the epoxy syringes surprisingly awkward to control. I’d press the plunger expecting a tiny amount, only for the epoxy to continue flowing afterwards and leave me with far more adhesive than I actually needed. Compared to the super glue I’d used before, the whole process felt noticeably messier, with excess epoxy squeezing out of joints and creating more clean-up work than expected.
At the time it mostly just felt untidy and inconvenient, but as the assembly progressed it ended up causing a few more problems later on as well.
The first two sections — MB-Base Ring 1 and MB-Base Ring 2 — actually went together fairly well, even if the process was a little messier than I’d planned. There was quite a bit of excess epoxy squeezing out around the joints, but nothing that couldn’t be cleaned up later once everything had fully cured.
The real problems started once I added MB-Base Ring 3.
After applying the epoxy and clamping everything into place, I set the assembly aside to cure. At first glance it all seemed fine, but when I checked on it later I realised that MB-Base Ring 3 had shifted slightly while curing and was no longer properly aligned with the other sections.
Unfortunately, because the epoxy takes longer to fully set, there was enough time for the weight and tension in the large printed parts to slowly pull the section out of alignment before everything hardened completely.
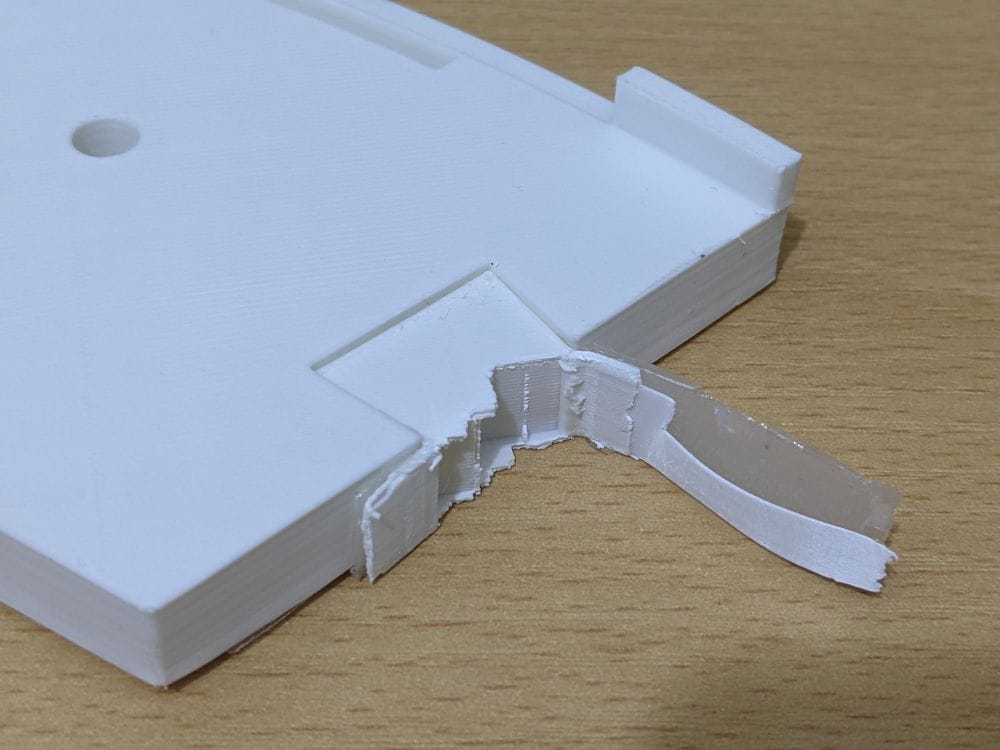
At first, I thought I might be able to carefully break MB-Base Ring 3 back off, clean up the mating surfaces, and simply try again. Surprisingly, the epoxy separated far more easily than I expected, which in hindsight probably should have been a warning sign about how well the bond had actually formed.
Rather than risk alignment problems or weakened joints later on, I decided the safer option was simply to reprint all three sections and start again from scratch.
Unfortunately, that led to another setback.
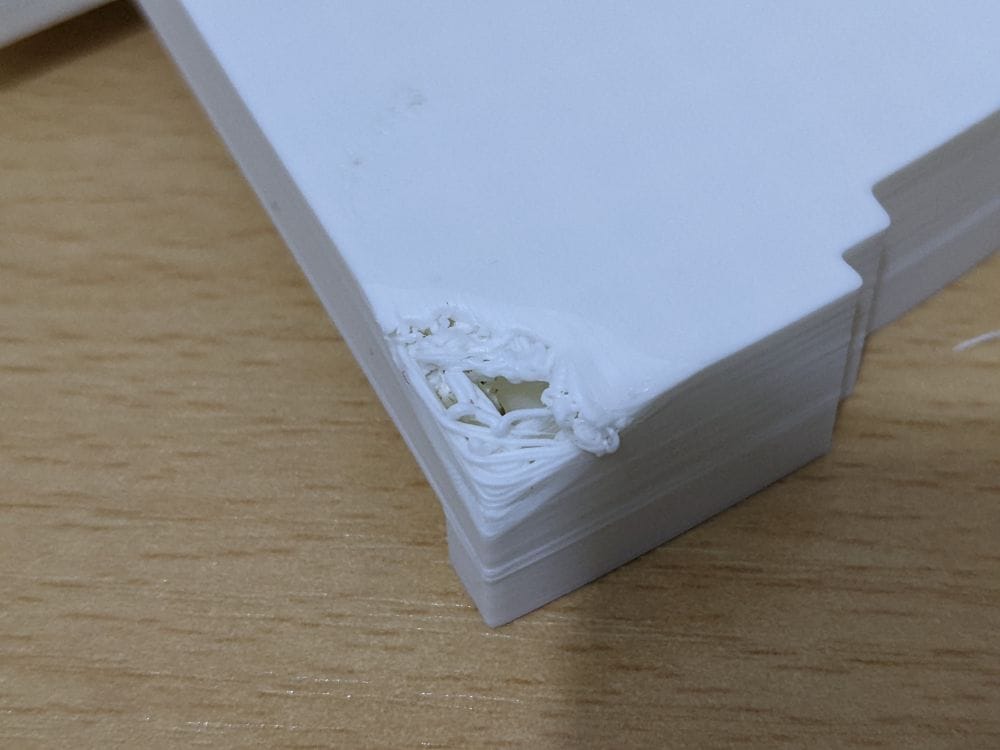
The replacement print didn’t come out particularly well, with some noticeable lifting and poor-quality edges around the corners — very similar to the curling issues I’d seen earlier, only worse this time around.
To try and solve the problem properly, I reprinted the parts again, this time adding a brim to improve bed adhesion and help keep the larger flat sections from lifting during the print.
That turned out to be a much better approach, and the corners came out noticeably cleaner and more stable.

At that point, I decided to abandon the epoxy altogether for this stage of the build. The longer curing time sounded good in theory, but in practice it was making alignment difficult, creating a lot of mess, and generally slowing the whole process down.
I started looking for an alternative adhesive and eventually settled on Bob Smith Industries BSI Maxi-Cure.
Compared to the epoxy, it was far easier to work with. The thicker consistency meant it stayed where I applied it rather than flowing everywhere, and only a few drops were needed along each joint. Holding the sections together for around 25 seconds was enough to get a solid bond, while still giving me just enough working time to make sure everything lined up properly.
The difference was immediate. The assembly process became cleaner, faster, and much less frustrating, and before long I had the entire base ring fully glued together.
What I Learned From the Base Ring
Although the base ring seemed like a fairly straightforward place to start, it turned out to be a really useful learning experience for the rest of the build.
The biggest lesson was just how important bed adhesion is on larger prints. Something as simple as regularly cleaning the print bed with washing-up liquid made a noticeable difference to reliability and helped prevent corner lifting and failed first layers.
I also learned that the “best” glue really depends on the type of project you’re working on. While epoxy sounded like the safer option because of the longer working time, it actually created more problems for large printed sections where alignment mattered. In the end, the thicker cyanoacrylate glue worked far better for this kind of assembly.
Adding a brim to larger parts also proved worthwhile. It added a bit more cleanup afterwards, but the improvement in print stability easily justified the extra effort.
Most importantly though, the base ring gave me a much better understanding of how this entire R2 build is likely to go. Even this early on, it’s already clear that patience, preparation, and problem-solving are going to be just as important as the printing itself.