
R2-D2 Part 7: Fixed Shoulders
Part 7 of my full-size R2-D2 build focuses on the fixed shoulder assemblies. From printing and assembly to testing Bambu Lab PLA Silk+ Silver for the first time, this stage prepares the body for the future leg installation.
The next part of my R2-D2 build is the internal fixed shoulders.
There are modified versions available that allow the shoulders to move, giving the legs a bit more independent movement, but for this build I wanted to keep things simple and stay closer to the original design. Because of that, I decided to use the fixed shoulder setup.
With the fixed shoulders fitted, the legs can still be mounted in either the upright position or the rear-leaning position, but they are locked into place using bolts rather than being adjustable on the fly. For the way I am building this R2-D2, that should be more than good enough.
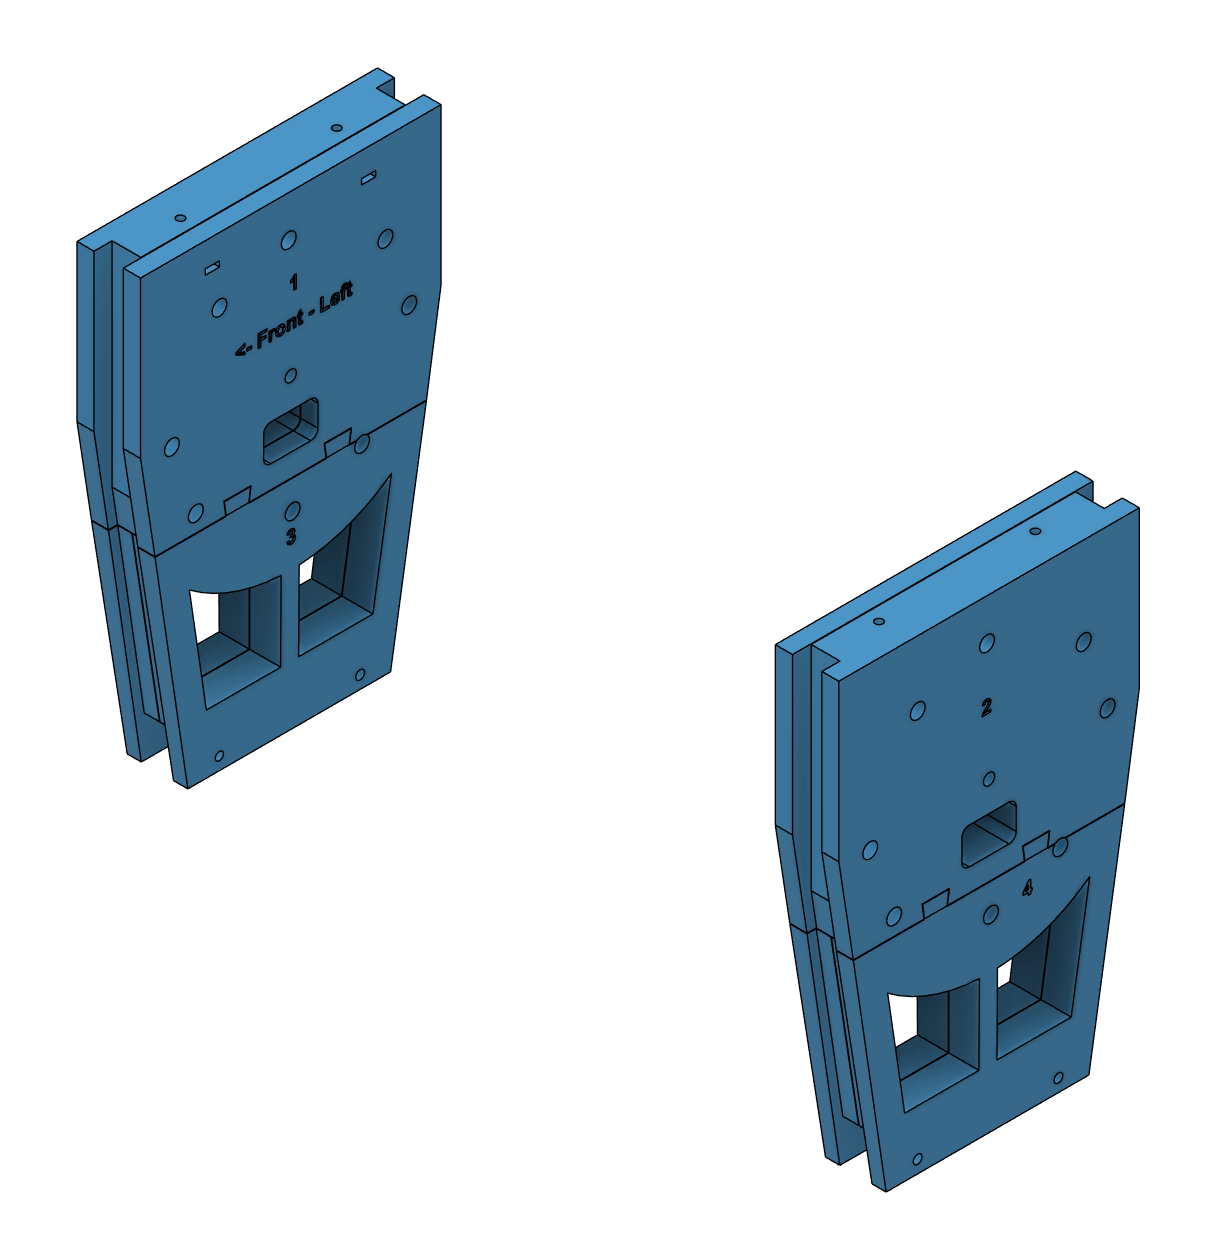
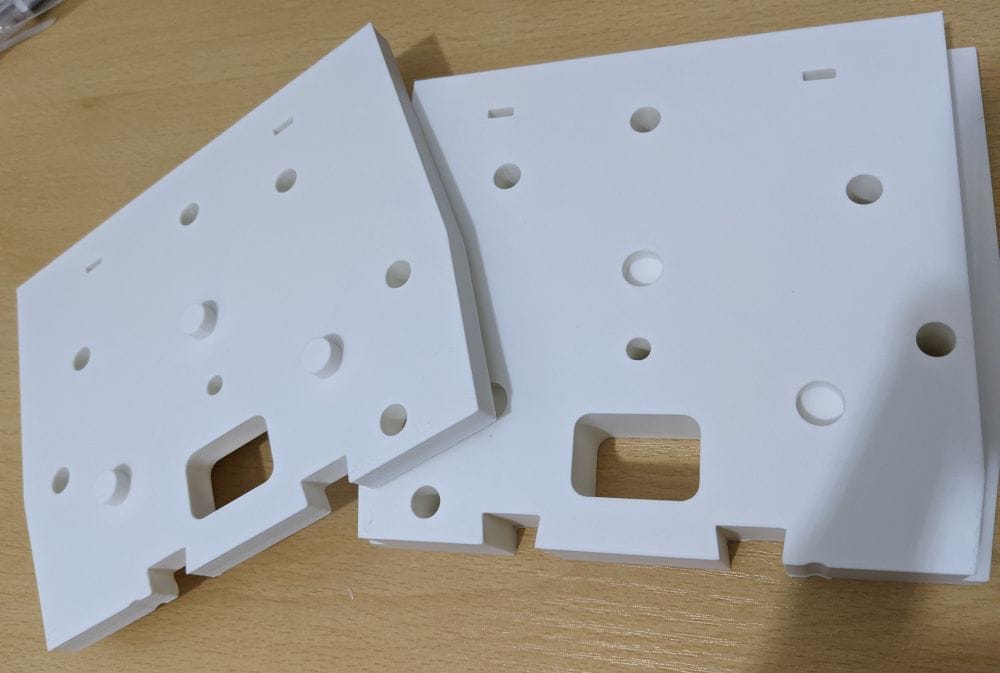
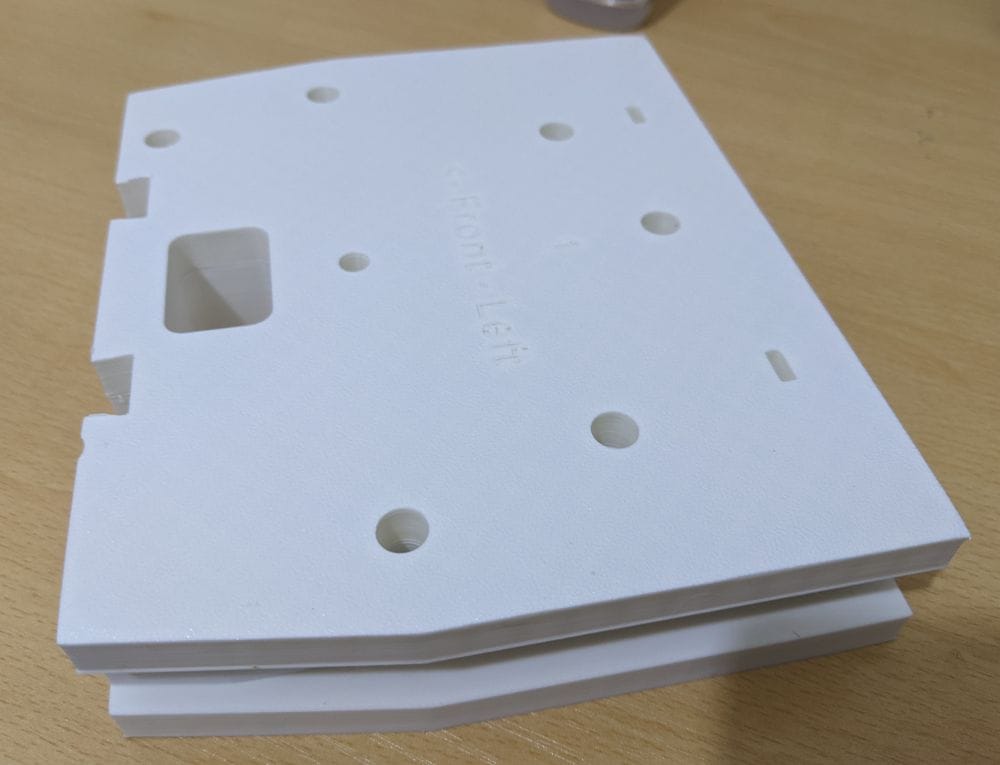
Each shoulder is made up of four printed parts. Thankfully, all of the pieces print flat on the bed, so I was hoping they would come out cleanly and accurately. That was especially important because these parts have to slide into the recessed areas inside the body frame, and from what I had read, the fit can be very snug.
So this was one of those sections where the printing looked straightforward, but the real test would come later when everything had to slot into the body properly.
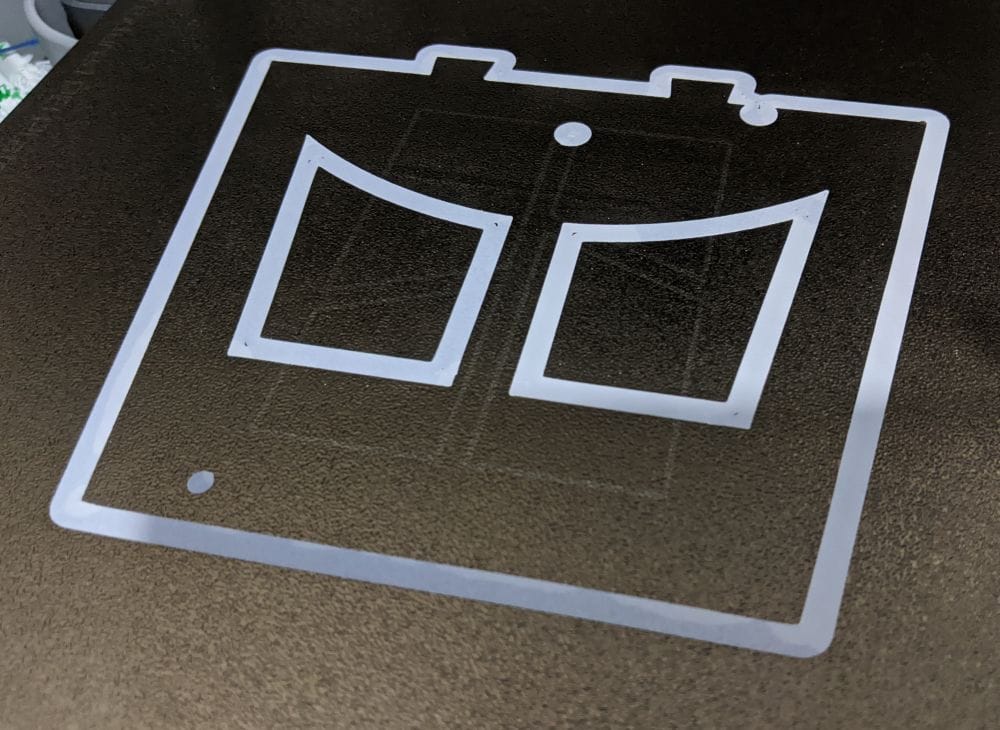
For these parts, I decided to use both an external and internal brim. After some of the issues I'd experienced with larger parts lifting from the build plate in previous stages of the build, I didn't want to take any chances, even though these pieces were relatively flat.
To my surprise, the approach worked perfectly. The parts stayed firmly attached throughout the print, and there were no signs of warping or corners lifting from the bed.
Even better, when I removed the first shoulder part from the print bed, most of the brim remained stuck to the build plate rather than the print itself. That meant cleanup was quick and easy, with only a small amount of trimming required before the part was ready to use.
It's always satisfying when a print comes off the bed with minimal post-processing required, especially after spending so much time dealing with support removal, failed prints and bed adhesion issues elsewhere in the project. In this case, the brim provided the extra security I wanted without creating a lot of extra work afterwards.
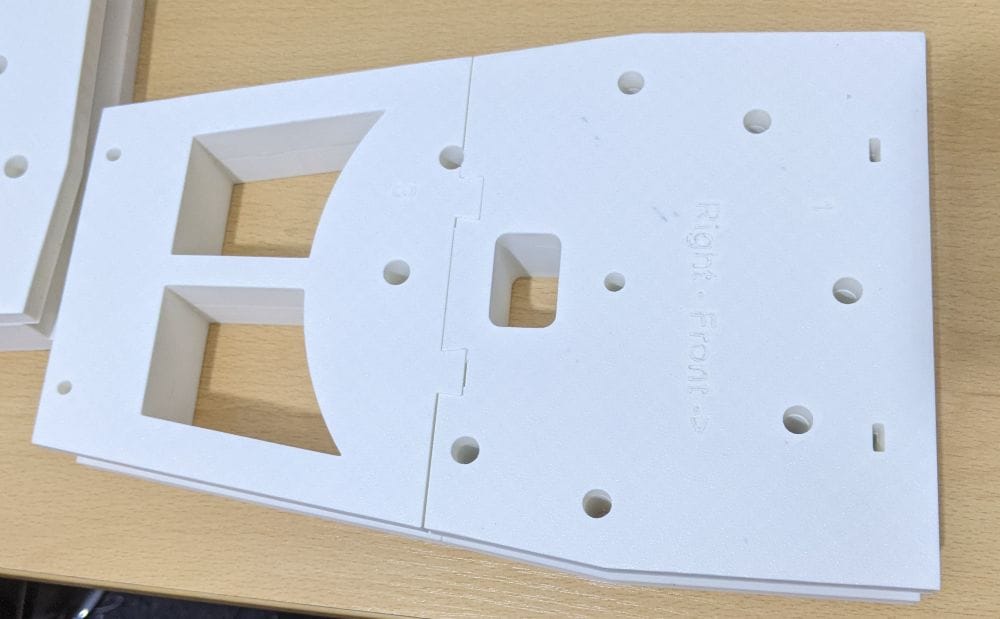
The shoulder parts were designed with built-in locating lugs and matching alignment holes, which made assembly very straightforward. Once the pieces were cleaned up, they could only really fit together one way, removing much of the guesswork from the process.
The lugs helped keep everything correctly aligned while the glue set, ensuring the edges lined up neatly and the finished assembly remained square. This was a welcome change from some of the earlier parts of the build where clamps, alignment pins and a fair amount of persuasion were sometimes needed to get everything positioned correctly.
Before applying any glue, I dry-fitted all of the parts together to make sure everything aligned correctly. The fit was good, but experience has taught me that it's much easier to discover potential problems before the glue is involved.
I also took the opportunity to work out where I was going to position the clamps. Some assemblies can be awkward to clamp once glue has been applied, and there's always a bit of pressure to get everything aligned before the adhesive starts to set. By rehearsing the assembly first, I knew exactly where each clamp would go and how I was going to hold the parts together.
Once I was happy with the fit and clamping arrangement, I took the assembly apart, applied the glue, and put everything back together. Having already practised the process made the final assembly quick and stress-free, with the clamps holding everything securely while the glue cured.
The assembly sequence was fairly obvious once I had examined the parts. Rather than trying to glue all four pieces together at the same time, it made much more sense to build the shoulder in stages.
I started by gluing the two lower sections together, making sure the locating lugs were fully seated and the edges were aligned correctly. I then repeated the process with the two upper sections, creating two larger sub-assemblies that were much easier to handle.
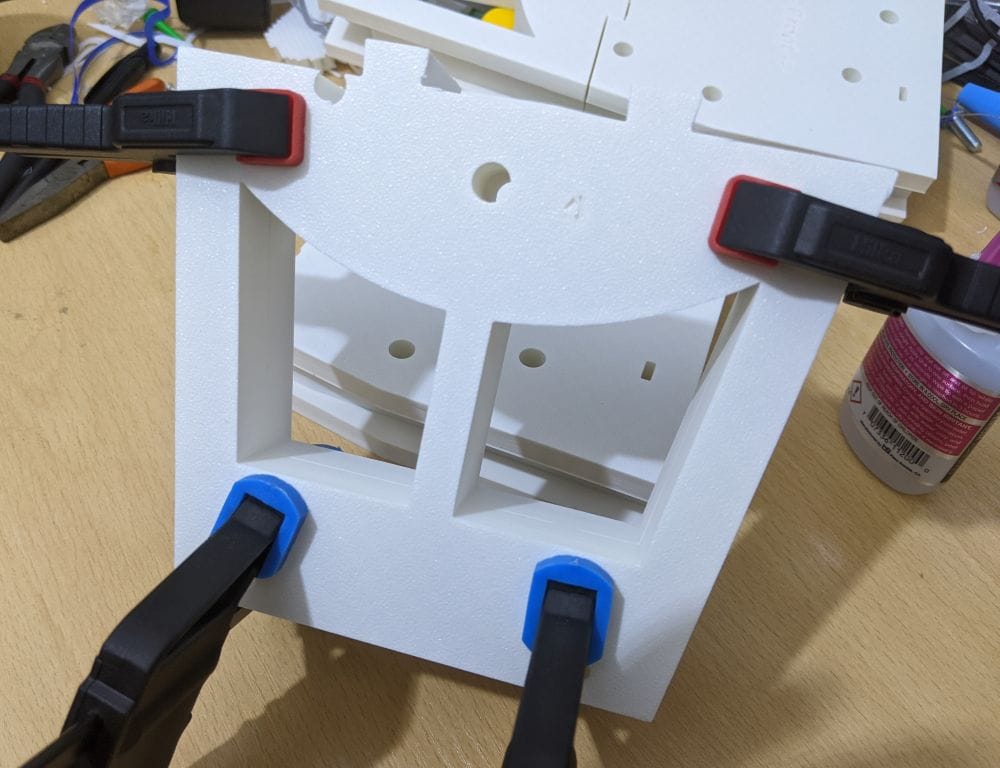
Gluing the upper and lower assemblies together proved to be a little more challenging than assembling the individual sections. Although the locating lugs helped guide the parts into position, there was still enough movement that I needed to pay close attention to the alignment before the glue started to set.
As with the earlier stages, I carried out a dry fit first and spent some time working out where I could place the clamps. The shape of the assembly meant there weren't many obvious flat surfaces to clamp against, so I had to experiment a little to find positions that would apply pressure without pulling the parts out of alignment.
Once I had a clamping plan worked out, I applied the glue and brought the two assemblies together. A few adjustments were needed to make sure everything sat square, but after checking the alignment from several angles, I tightened the clamps and left the glue to cure.
It took a little more patience than the earlier stages of the build, but the extra preparation paid off, and the shoulder assembly came together cleanly and remained straight while the glue set.
With the shoulder assemblies completed, it was time to print the hub sections. These are the parts that eventually connect the shoulders to the legs using bolts, allowing the legs to be secured in either the upright or rearward position once I get around to printing them.
For these parts, I finally had an excuse to open a new spool of Bambu Lab PLA Silk+ Silver. I'd been waiting for this filament to come back into stock because it is the material I intend to use for the dome. The dome is one of the most recognisable parts of R2-D2, and I wanted something that would give a convincing metallic appearance without having to paint it.
According to Bambu Lab, PLA Silk+ Silver produces a finish that closely resembles polished metal, and I was eager to see how accurate that claim was. Up until now, most of the build had been printed in white, blue, grey and the occasional replacement colour when I ran out of filament, so seeing a silver part emerge from the printer felt like a significant milestone.
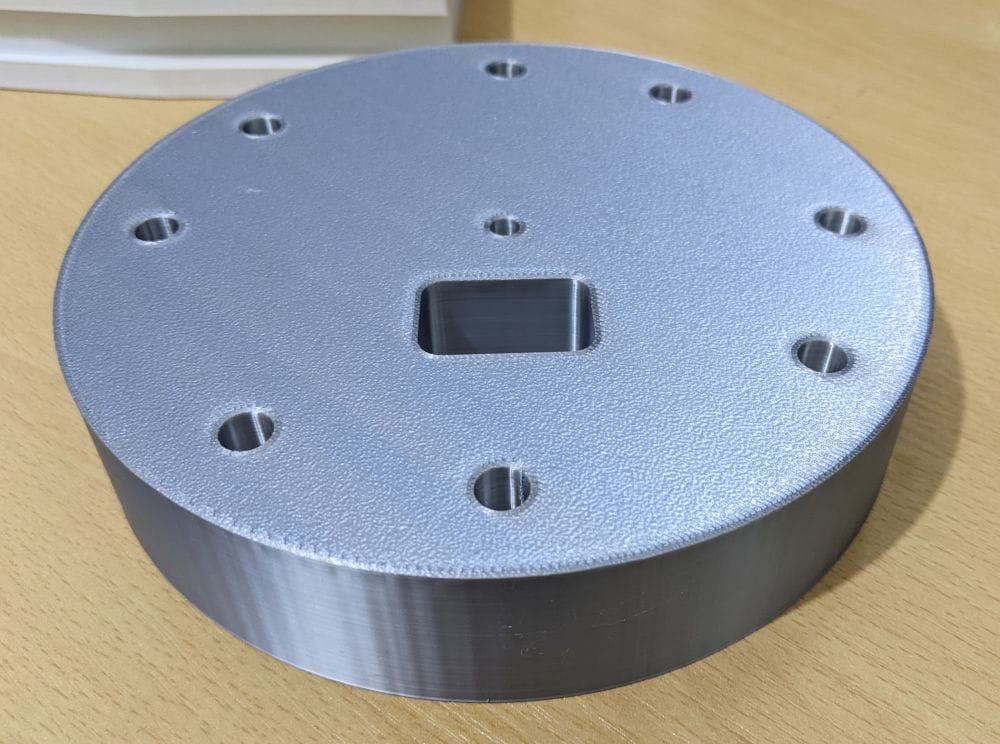
Although these hub components will be mostly hidden inside the finished robot, they provided the perfect opportunity to test the new filament before committing to the much larger and more visible dome sections later in the build.
While working on the shoulders, I also picked up a new long-cure adhesive. I wasn't planning to use it here, but I knew I'd soon need it for a much bigger task: finally assembling the main body sections into a single structure.